Ultimate VTT – Amidst The Eidolon
Responsible for creating an Open Alive D&D World in Unreal Engine 5.
Responsibilities contain:
- Pitching different ideas, concept and experiences to create a unique world.
- Sketching a base world plan based on established rules and lore.
- World-Systems Design to create a living and rich world.
- Communication between different departments in the form of shared responsibility.
- Blocking out playable areas based on previously established sketches and concepts.
Phase 0 – Research
Arguably one of the most important steps that does not get talked about. In the beginning of the internship I set goals for myself, things I wanted to get out of the internship. However, an idea without a plan is a dream, so in the first week I conducted research on my learning goals and how I would achieve them. The overall document was about twenty-nine pages long, and was a deep dive into Horizon Forbidden West for their World-Systems and Narrative levels. This research took about a week, and still helps me months after, it is nice to have a constant reminder of what your goals are and how to reach them.
Phase 1 – Concepting and Pitching
Before starting on creating the world, there would need to be a world concept. So I was tasked with creating multiple concepts for me to pitch to the team. I wanted to share the ownership for the world with the entire team, this way everyone could add their part to it and share the passion. Pitching would help me achieve that.
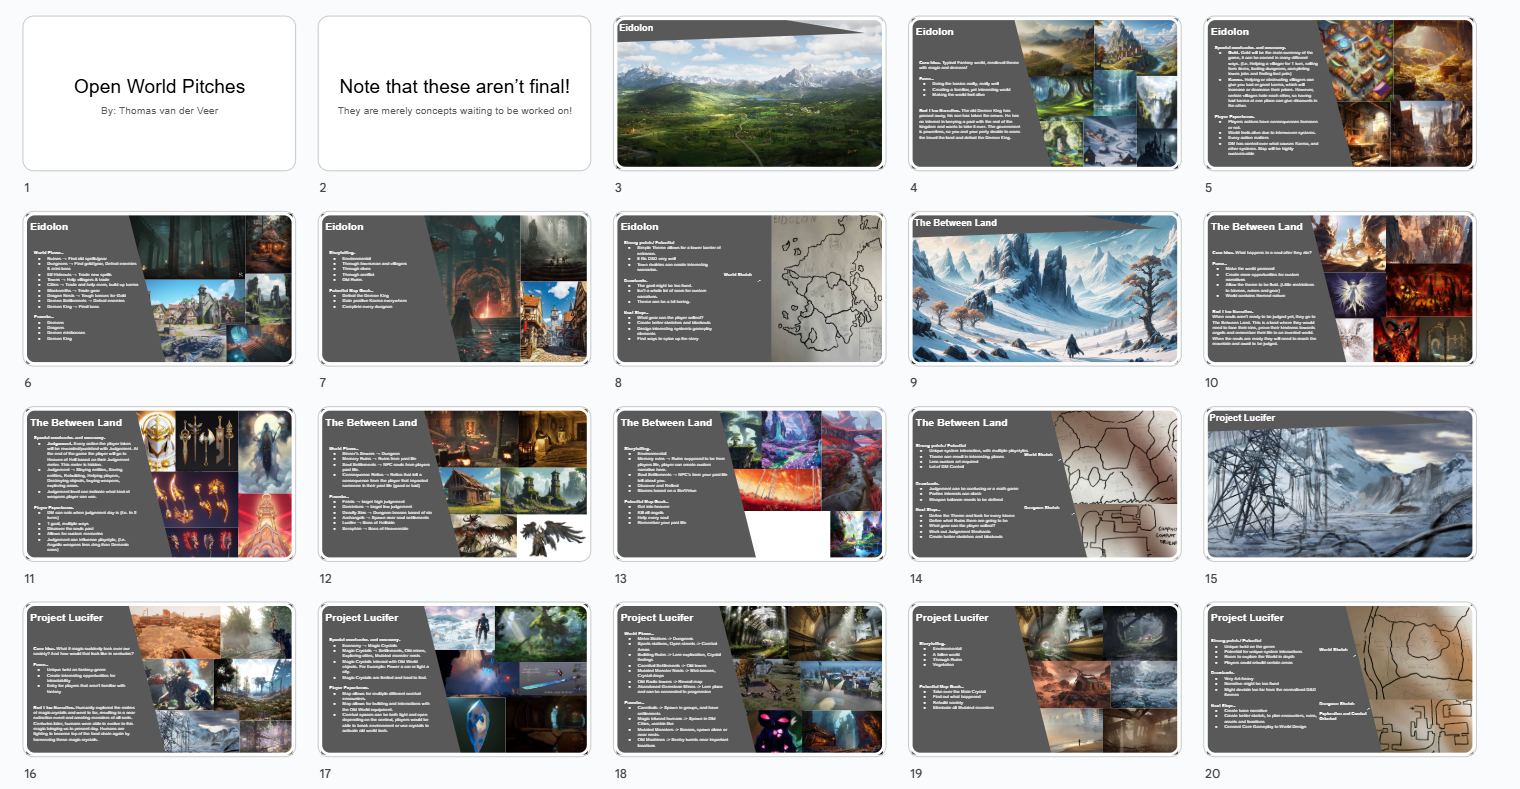
Figure 4. Image of first three world concept pitch presentation
These first three concepts had very different ideas to them, this was done on purpose. I knew not a single concept was going to be chosen, they were going to be ripped apart and mixed into one single concept. Turns out, this was exactly what happened. In addition to that, I also added a “potential, strengths and weaknesses slide” to give the team an easier time of choosing aspects of the concept. But what are the first three concepts about?
First of all, we start with the most simple concept. Eidolon is the name, it is supposed to be a classic fantasy-like world, very inspired by the show Frieren: Beyond Journey’s End. The systems would not be that unique looking back on it. The concept had a karma system which would basically be a complex relationship system between factions. Overall this concept was really simple and familiar which was both its strength and weakness.
The second concept was a bit more spicy. The theme of this concept was Limbo. In a nutshell, the player has died in the real world and thus appears in Limbo. The player has no recollection of their past life, and has to gather their memories back before being sent to either heaven or hell. The unique system would work together with the alignment system from D&D to create a Judgement system. Every action the player would perform in the world, will have an effect on their Judgement. This would be brought up again at the end of the campaign.
The third concept was the craziest. It would be set in a post-post-apocalyptic world, heavily inspired by the Horizon series. Thus this world is called “Project Lucifer”. The unique system of this world were these Power crystals, they were the original reason for the apocalypse but could also be the saviour. These power crystals had a unique interaction with the old-world machinery. These crystals could be picked-up/mined from the world, and then used in old-world machines. For example, a crystal can power an old car or gun for players to use in world and combat.
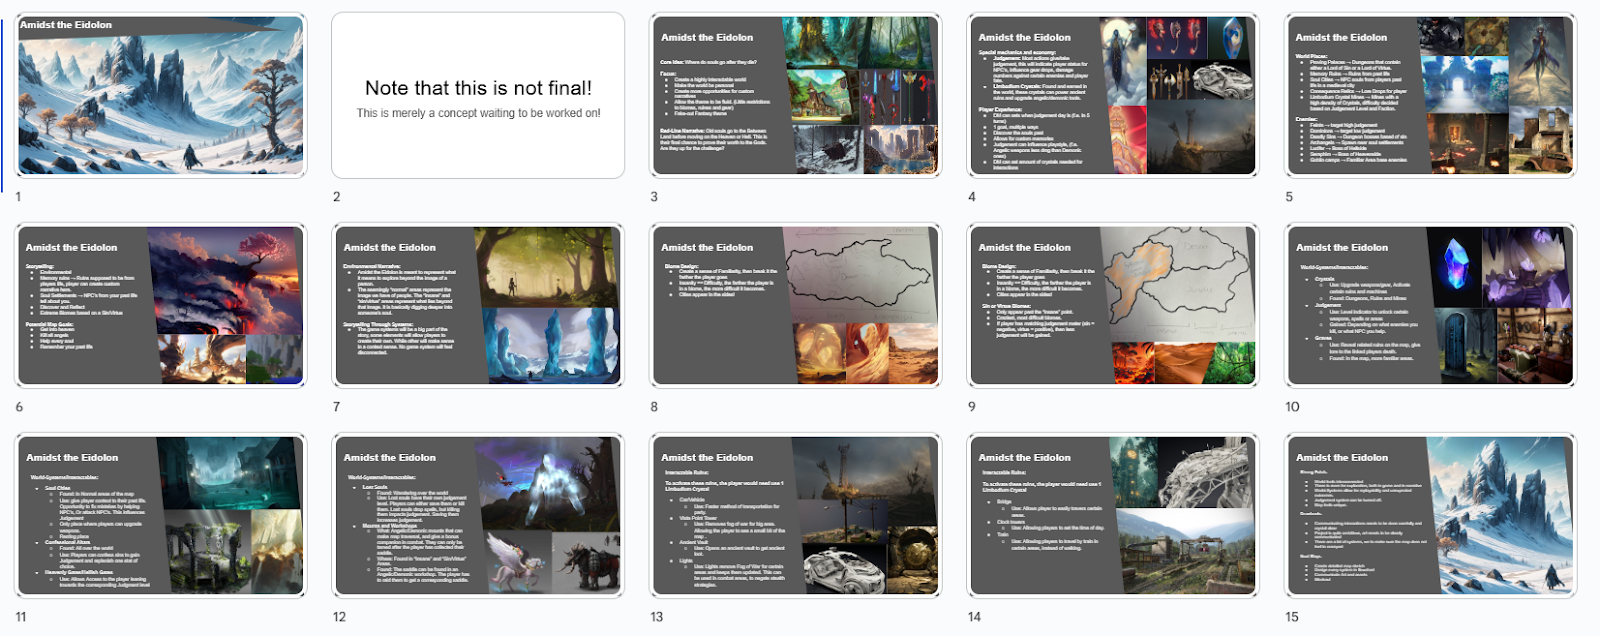
Figure 5. Final world concept pitch
The final pitch is a combination of all the prior pitches. It takes the simple familiar world from Eidolon, the Limbo theme and Judgement system from The Between Lands, the Energy crystals from Project Lucifer. Of course this all had to be balanced and adjusted to the new concept called “Amidst the Eidolon”. The concept got approved but the World-Systems needed more work, this would be done after more time because of my limited knowledge of D&D.
Before I could move on to making sketches of the world I needed to know important locations and geographical features. So I created the main narrative events for the world together with town relations in a 17-page document. This document has been very important to establish the rules of the world narrative wise, and it has been a core staple to complete my learning goal: “Implementing Narrative in Level Design”.
Phase 2 – Sketches
A sketch of an entire world takes multiple layers to fully make sense of. Because this is a world, everything needs to make sense to make players more immersed in a believable world. For this to work I needed to make a sketch that had layers.
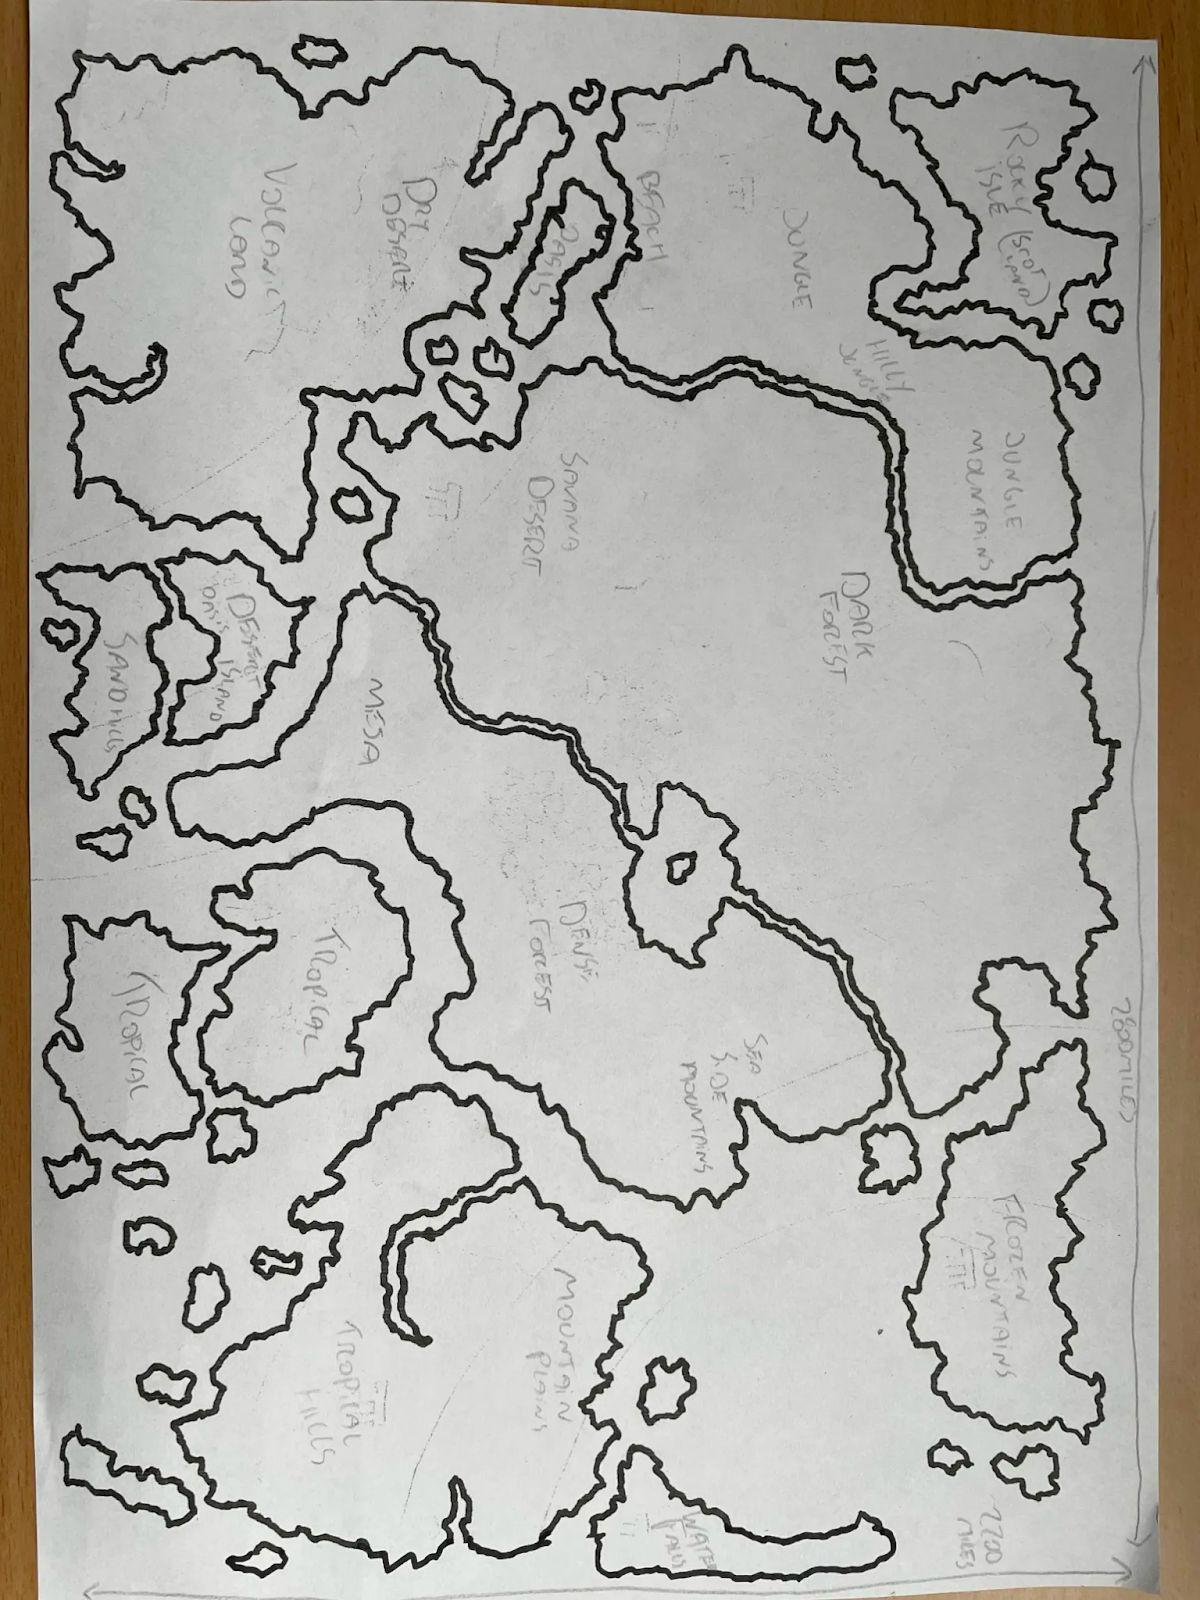
Figure 6. Base sketch of the World
Before I would be able to create a layered sketch I had to make a Base sketch, this would need to contain the layout of the continent. At the time of me making the sketch, it wasn’t decided that the final product was going to be a small portion of the world. In hindsight, creating the entire world in a sketch allowed us to choose a location to zoom in on with pre-established rules. I think that was really nice and it still gives me ideas of how a small piece of land can connect with the greater world. This sketch would be the base for the different layers to follow
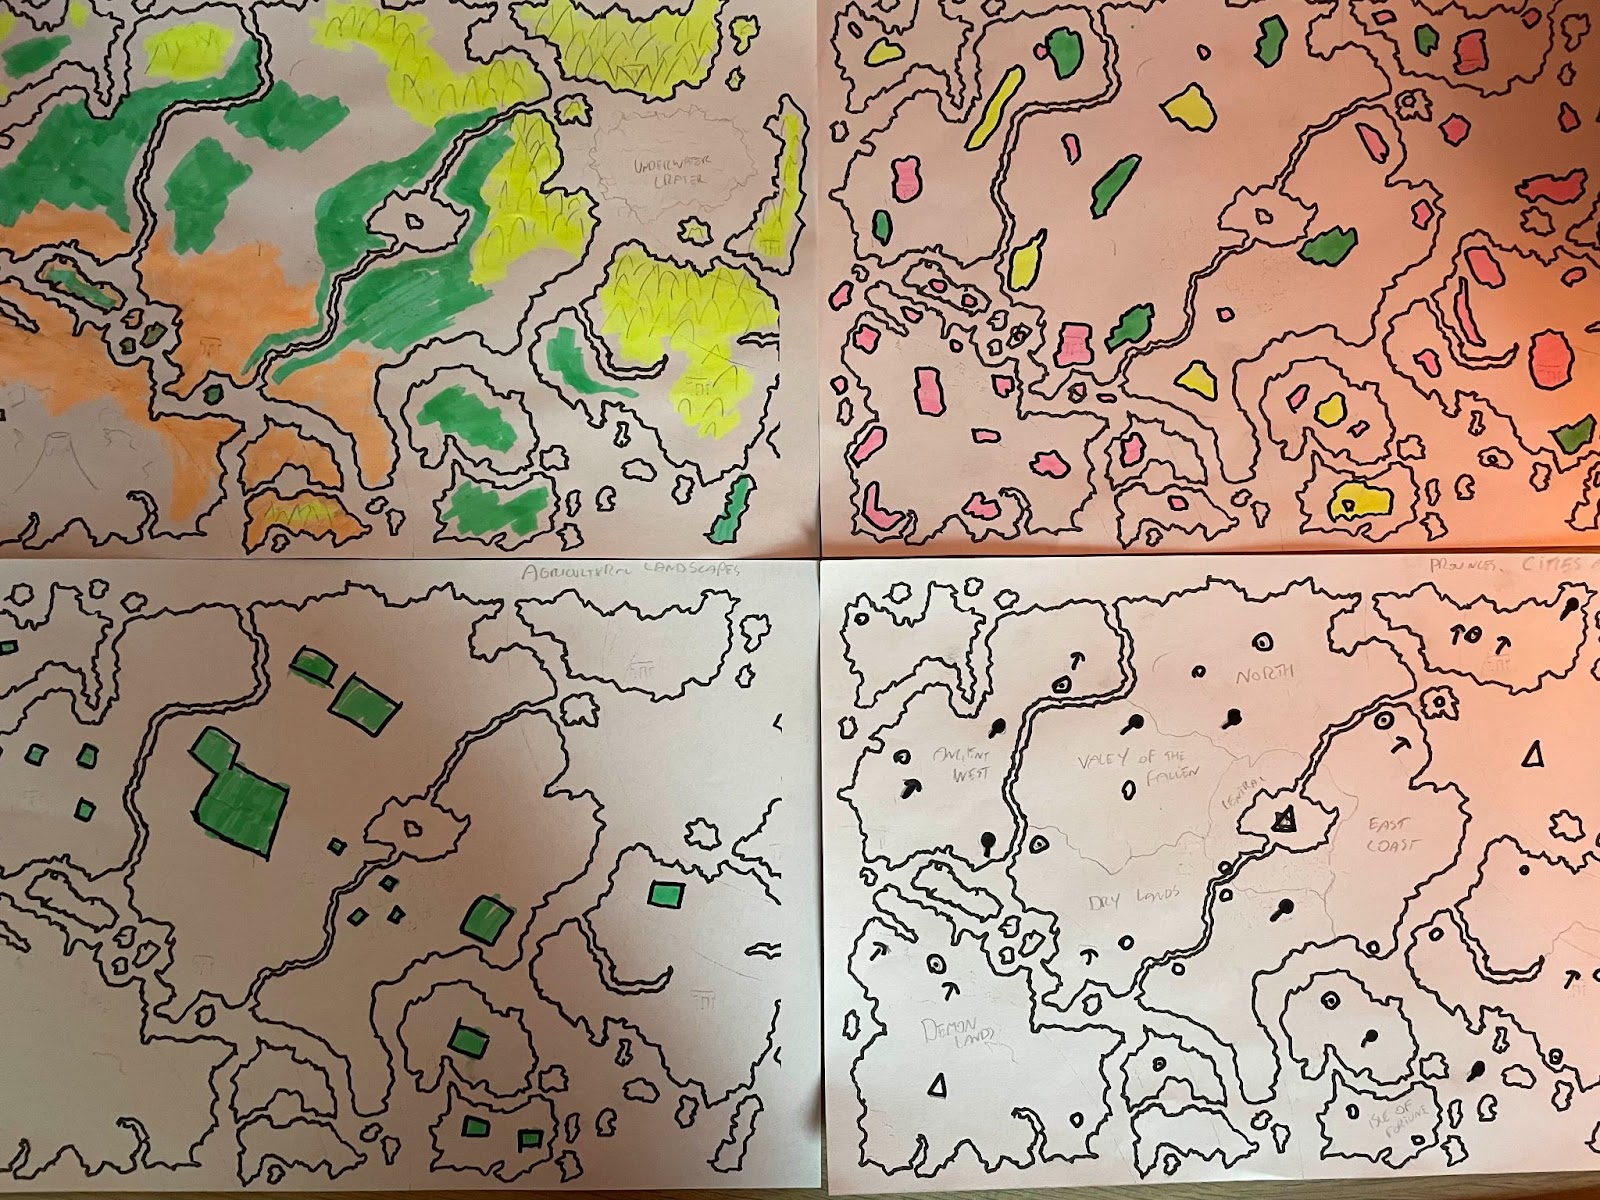
Figure 7. Layered sketches
I decided to make four different types of maps those are; Temperature TOP LEFT, Minerals/Underground ores TOP RIGHT, Great Farmland BOTTOM LEFT and Manmade (Villages, Towns, Cities, Mines and Ruins) BOTTOM RIGHT.
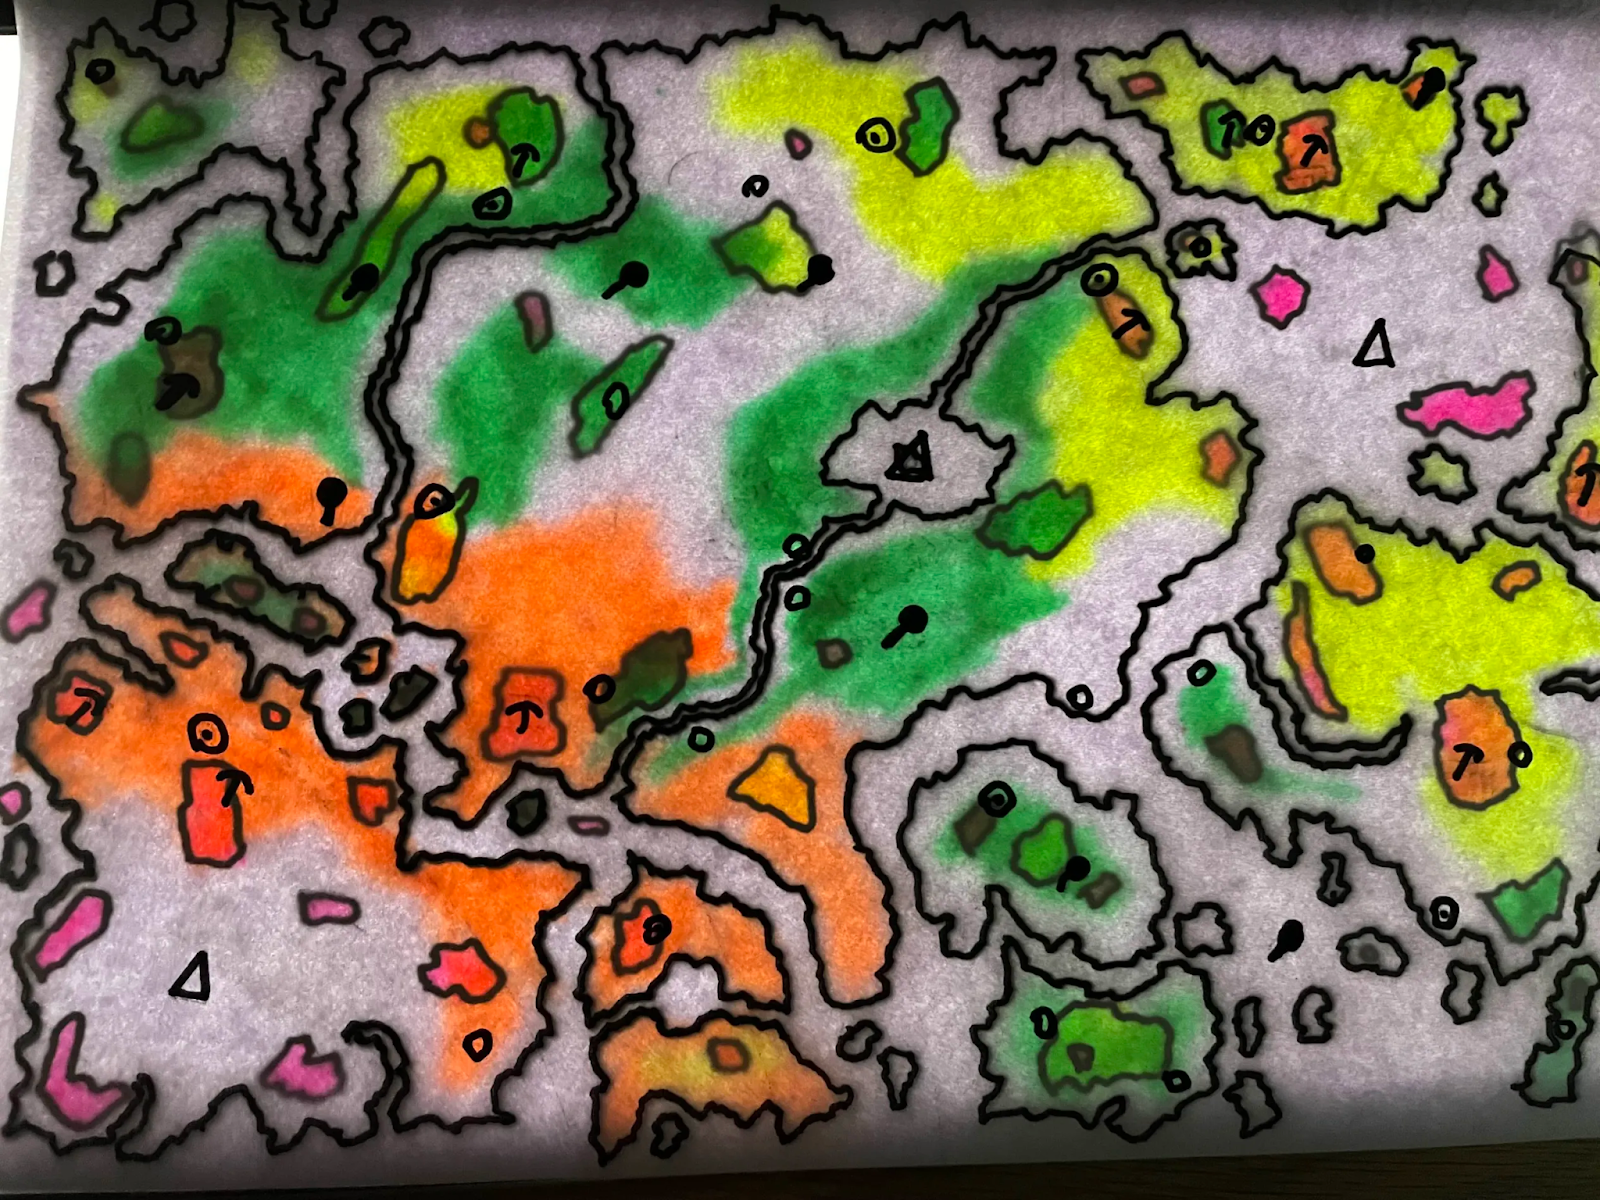
Figure 8. All layered maps on top of each other while on a bright surface
Every map, aside from Manmade, is based on nature and how the world would naturally form. Combining these maps together to create see-through and using the knowledge of current geographical locations for urban development, would allow me to create cities and towns that make sense. This is very important when creating a world and especially one for clever D&D players.
For example,”towns are usually near water so it makes sense to place bigger towns there as well. It wouldn’t be bad if there were no valuable ores nearby since this town would be able to run from trade along the coast.” or “A mine usually means profit and workers, it would make sense for people to capitalize off that. This brings the existence of villages or small towns that would otherwise have no reason to be in that specific area and survive only off minerals.”. The layered maps allowed me to create interesting and logical places, but most importantly, it made the world feel lived in!
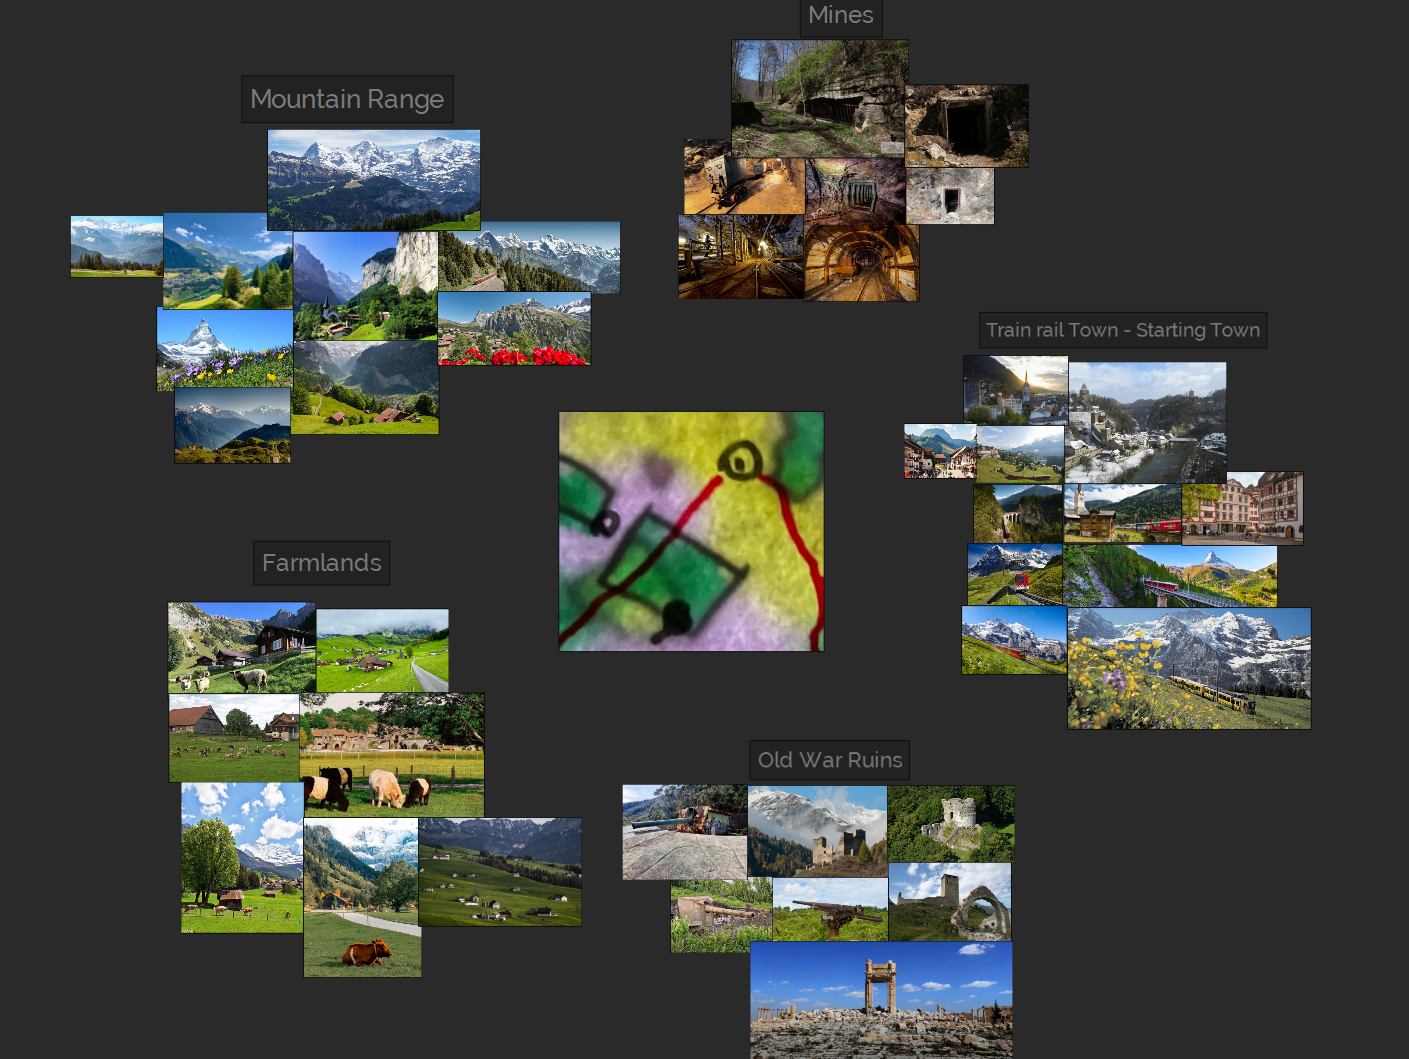
Figure 9. Vertical slice selected area
At this point in time, we had to choose an area for our vertical slice. After giving the team four different choices, which we later all decided would be this location up in the North of the world. Not only is this perfect for starting a campaign, this allows us to base the location off Switzerland to create stunning landscapes, which might I remind you is unique for a VTT.
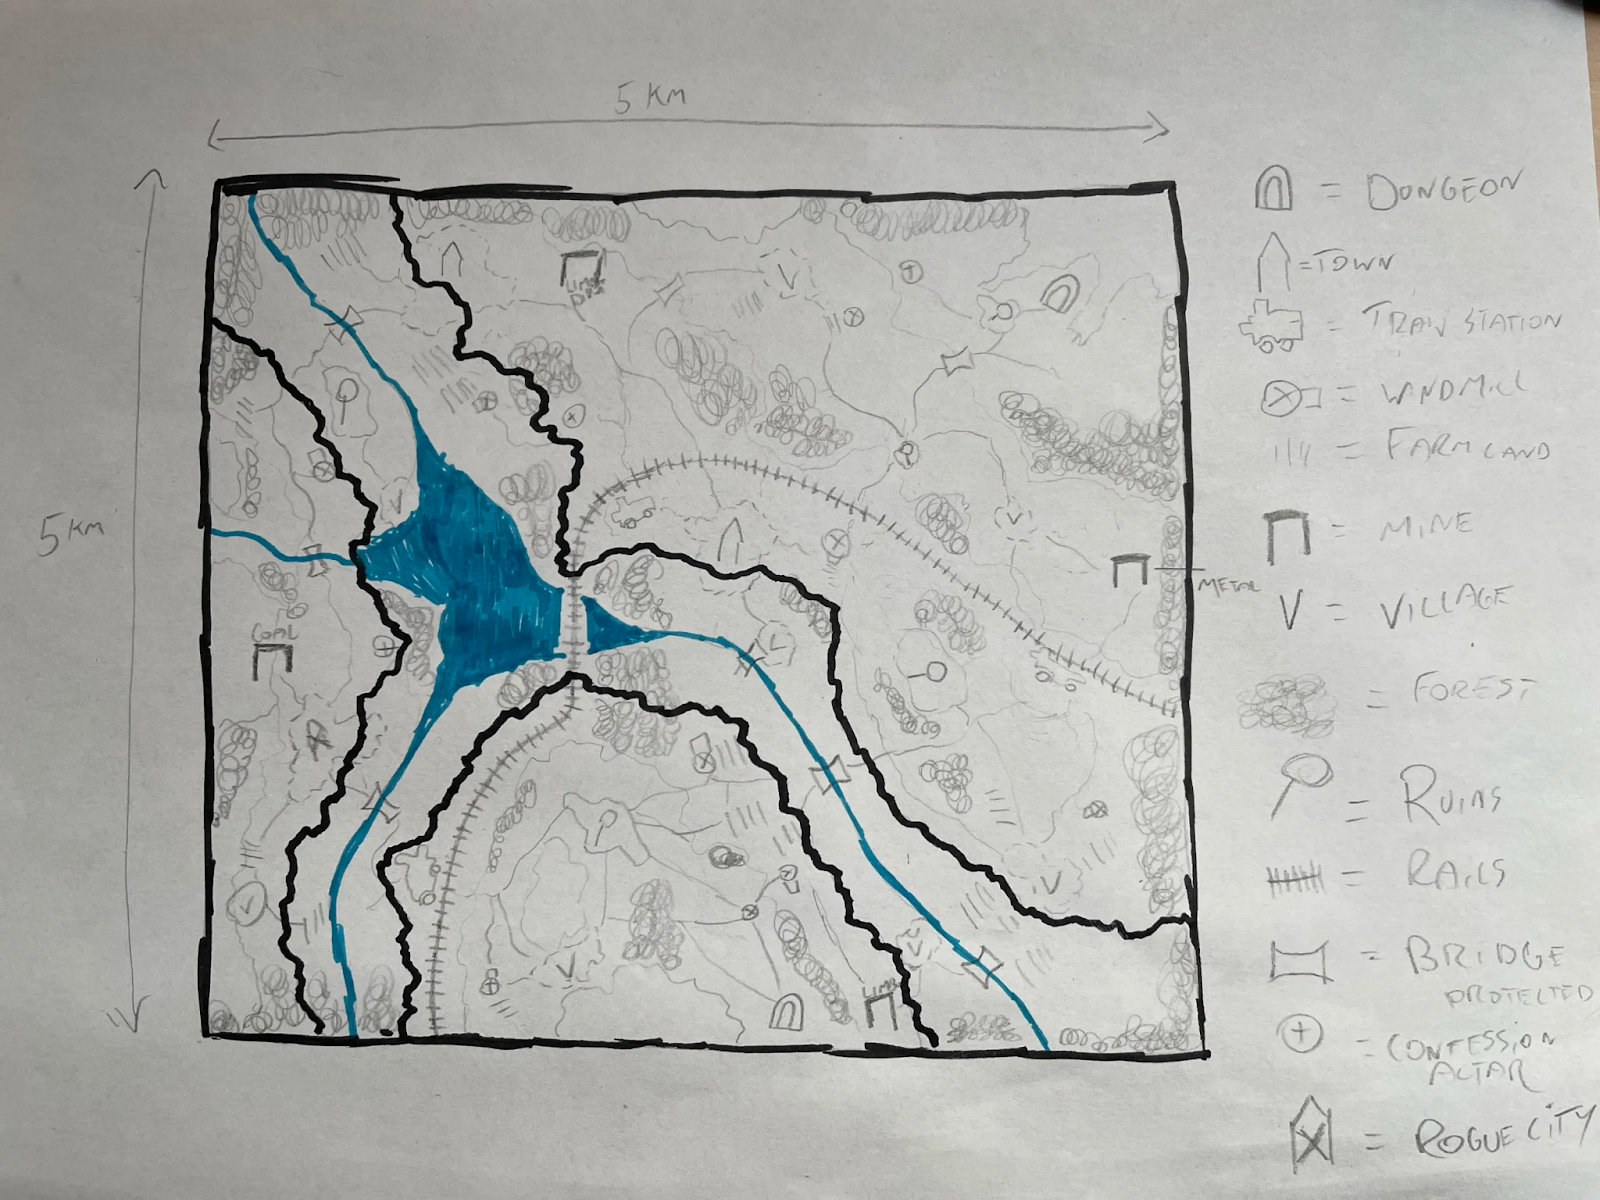
Figure 10. Detailed sketch of selected area
After deciding on an area, I got to work on creating a more detailed sketch. This was needed to aid me in development while blocking out and creating in Gaea. While sketching the area a bit more I thought it’d be a good idea to add more towns and villages to the area, this way the area is more lived in and campaigns aren’t mostly walking. The team agreed with this deviation and the area would go into development.
Phase 3 – Blockout and Scaling
The term blockout can be quite confusing seen as its a phase in development AND technique for creating playable levels. I will refer to the blockout phase as a scaling phase, using shapes to indicate scale and placement.
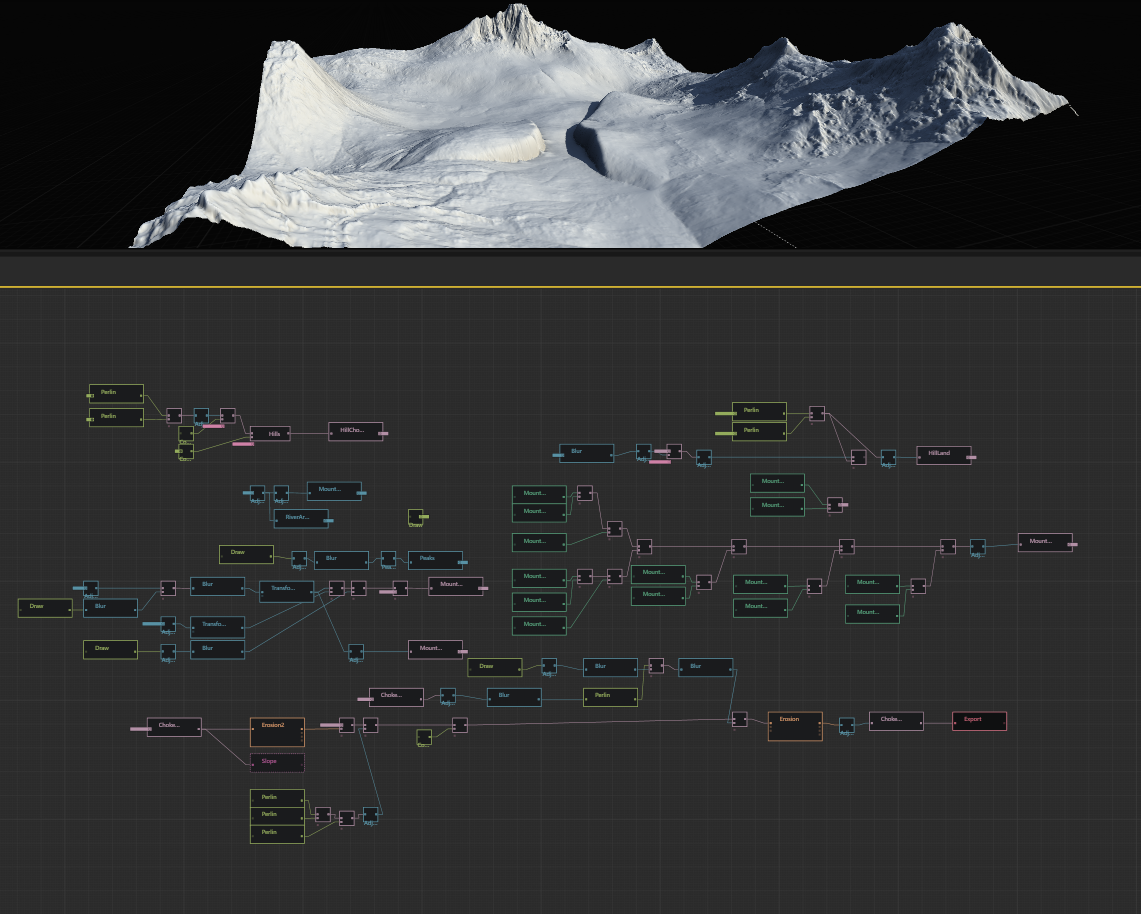
Figure 11. Gaea node setup and viewport for world selection
First of all, I started to create the world in Gaea based on the detailed sketch. Gaea is a fully procedural program to create massive landscapes. Making a world based on a sketch would be bringing restrictions in chaos. This took about a week to create and wasn’t the best way of making the world. If I could do it again, I would start with making the Gaea landscape share elements with parts of the world instead of making it very specific. Lesson learned.
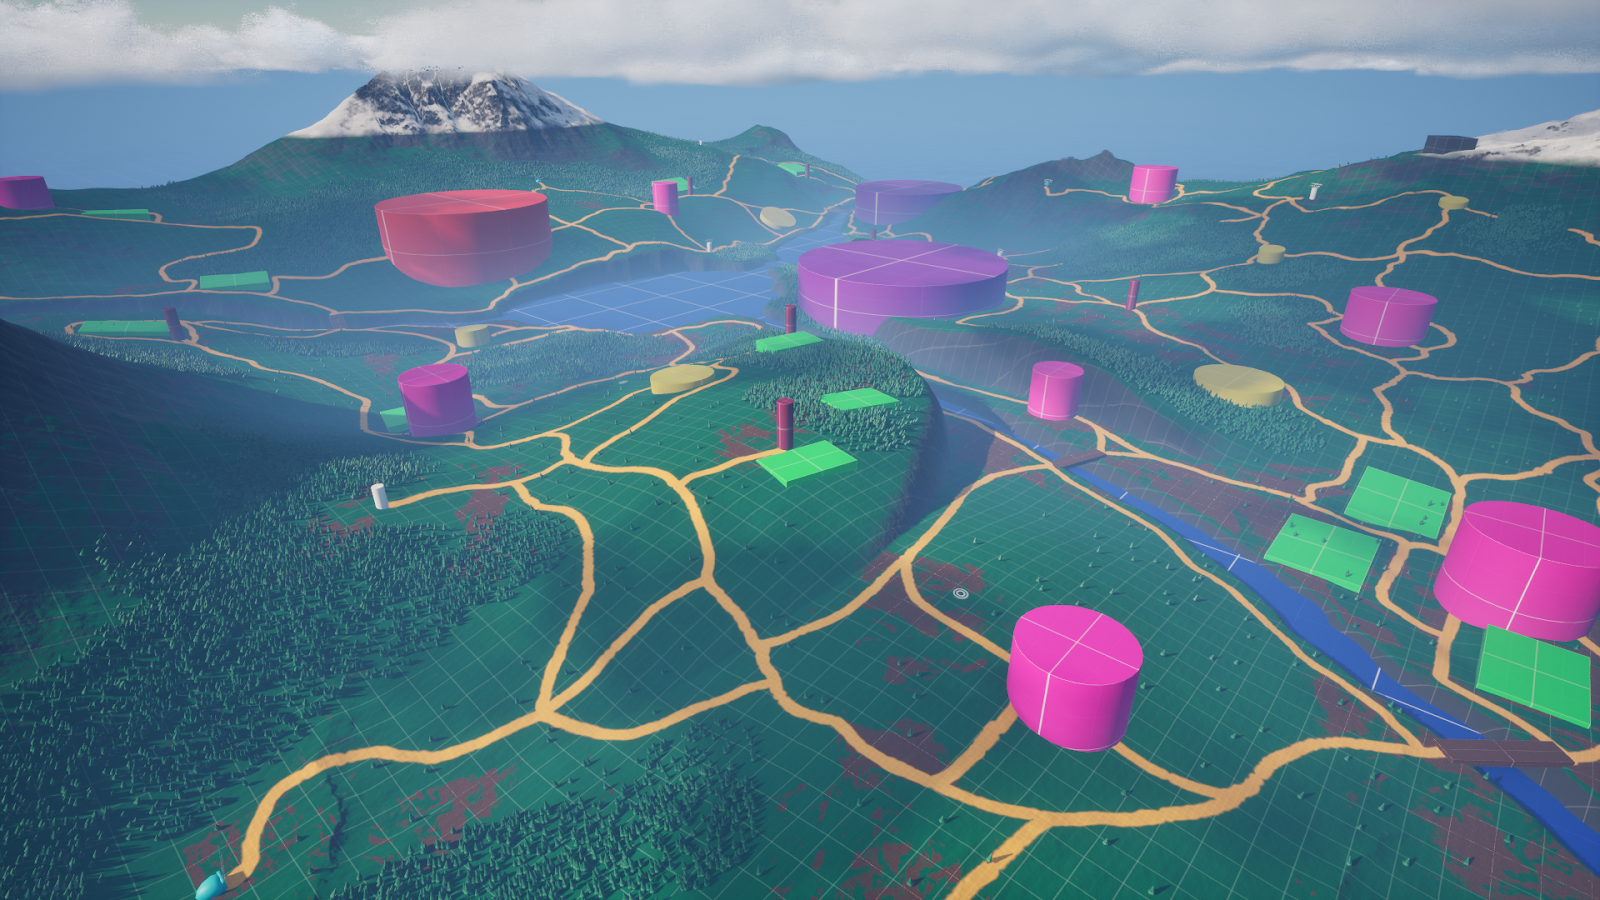
Figure 12. Blockout of main locations and POIs
After importing the landscape into Unreal, I worked on the overall blockout. This means that I created the overall size for the towns and villages. As well as important locations/Points of Interest. It was important to do this since I could solely focus on placement, this way I could integrate “Zone of Influence Design”. In a nutshell, Zone of Influence design is a form of World design to draw players from area to area in a very natural way. See the cylinders as magnets, when a player is drawn towards one they can choose between a maximum of 3 others. This limits choice anxiety, and can create new goals for the players without them noticing. Every single cylinder is strategically placed to allow for this to happen and create a naturally flowing world.
Because we are working with a D&D rule set, technically anything can be used for roleplaying. So we used this version for playtesting to get more knowledge about sizing and placement of the areas, as well as travelling between them. We changed a couple of locations before moving on to the first playable.
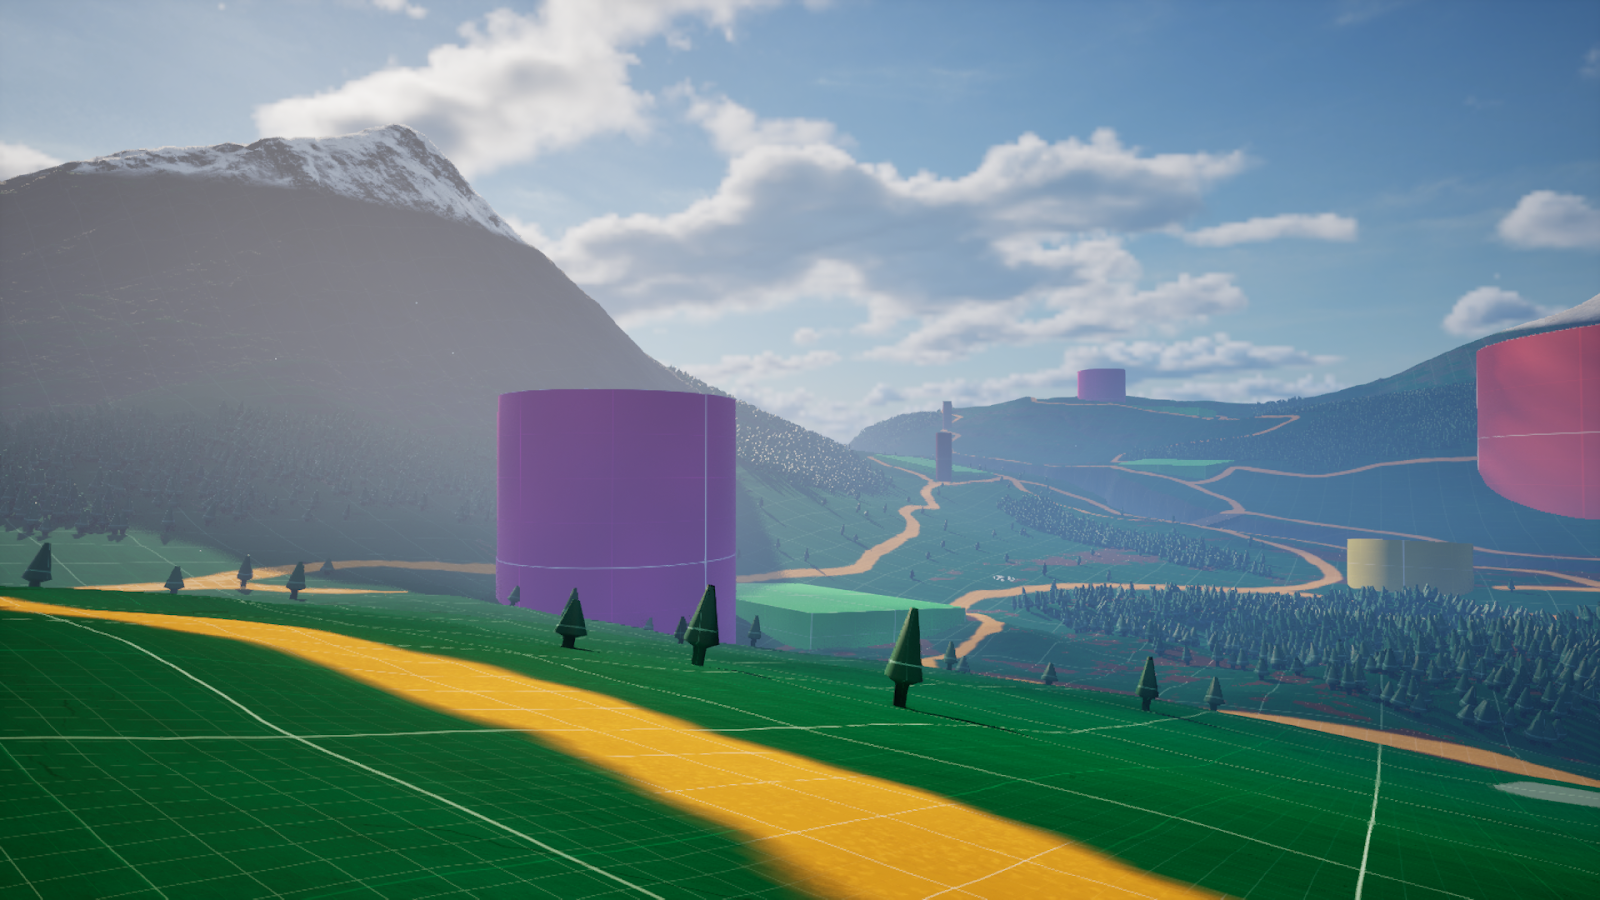
Figure 13. World blockout seen from an on-the-ground perspective
Phase 4 – First Playable
Before we dive in, what is the first playable? The First Playable is the first test-ready version of the game, complete with all the playable elements necessary. I will be using blockout techniques to achieve the first playable.
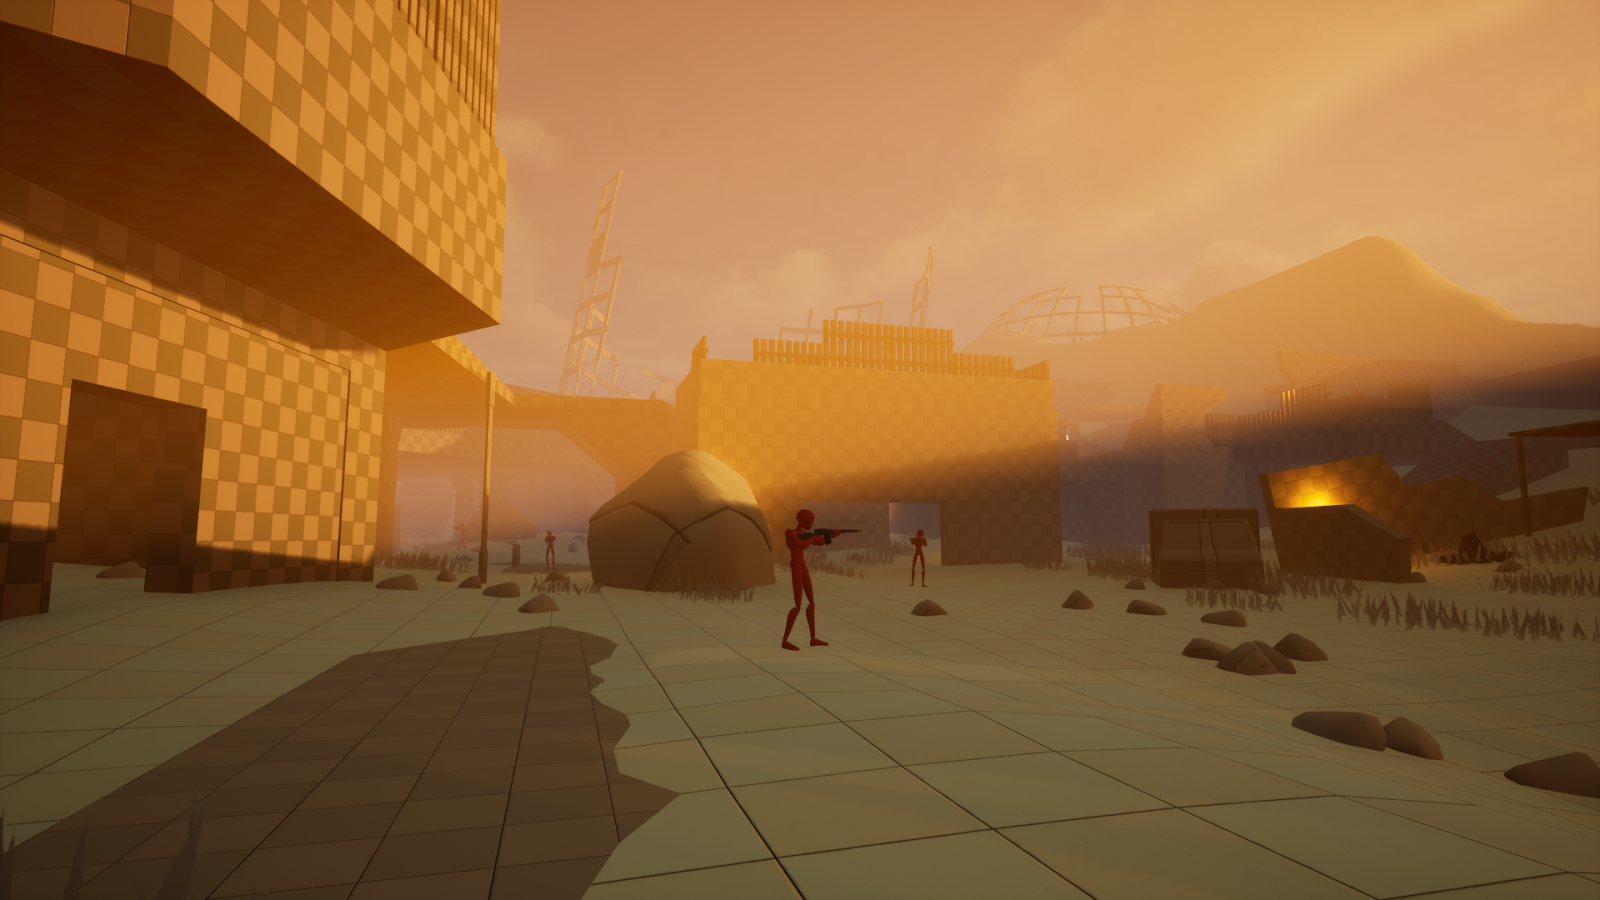
Figure 14. One of the side projects I’ve worked on aside from the internship
From this point on, the work is split between multiple people. I was tasked with creating the big towns and cities for the map. While others would focus on smaller aspects. They did this since I was warming up with Unreals Cubegrid system for about 2 months now in the form of side projects/portfolio items in my free time. My first task would be making “River Town” which is arguably the center of this map. I jokingly refer to it as “the Rotterdam of Eidolon” towards the Founders.
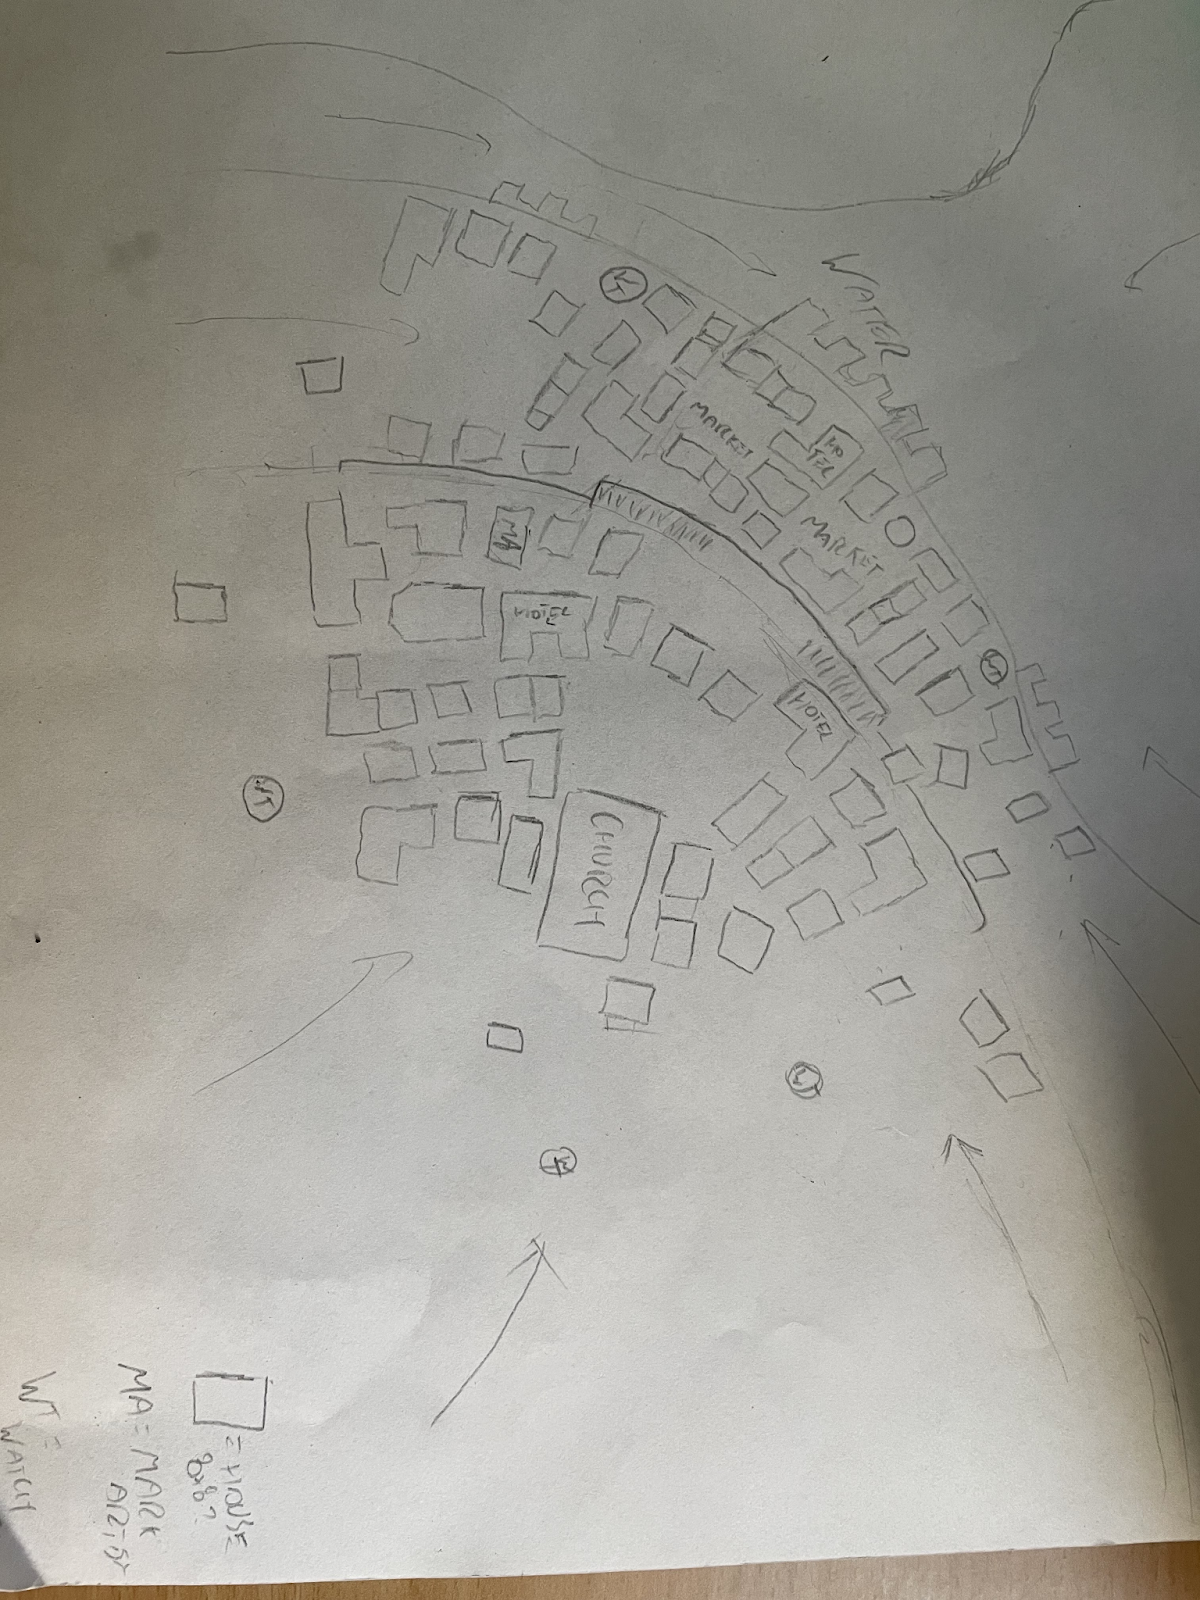
Figure 15. Sketch of River town
The sketch was meant to communicate the idea of the Town, and to spark more ideas before diving into the engine. I’m quite fascinated with the use of verticality in level design, this is something I really wanted to try out in this town. So I created 2 different sections, one near the river as a harbor and a more rich area on the mountains. They would be connected with a big bridge.
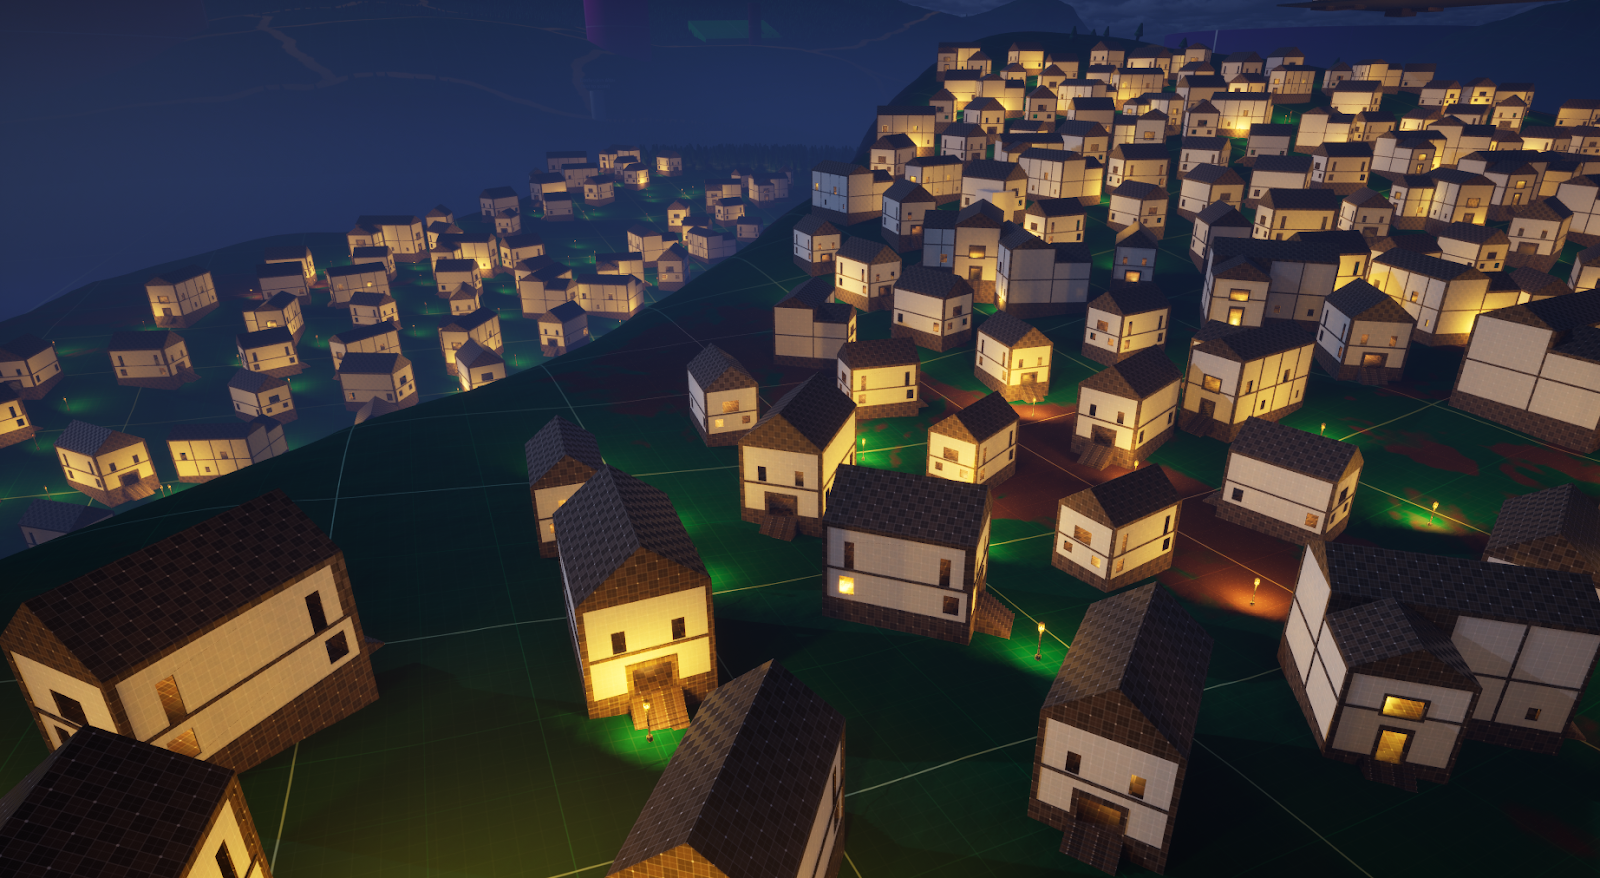
Figure 16. Two different houses spawning with PCG to create the city feel
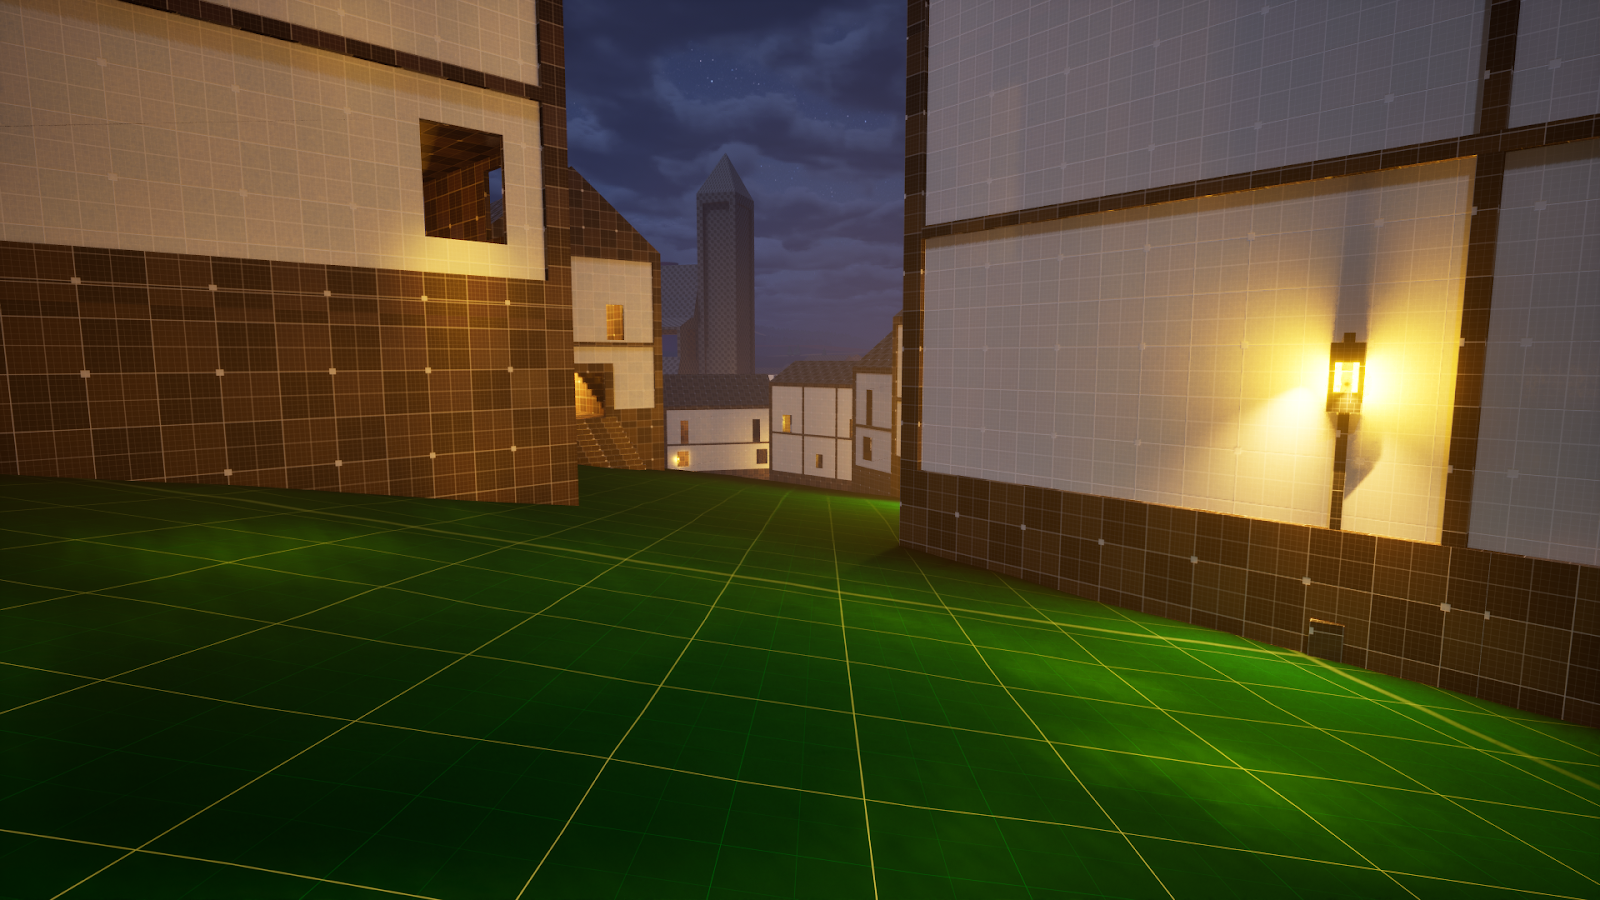
Figure 17. First blockout of the church
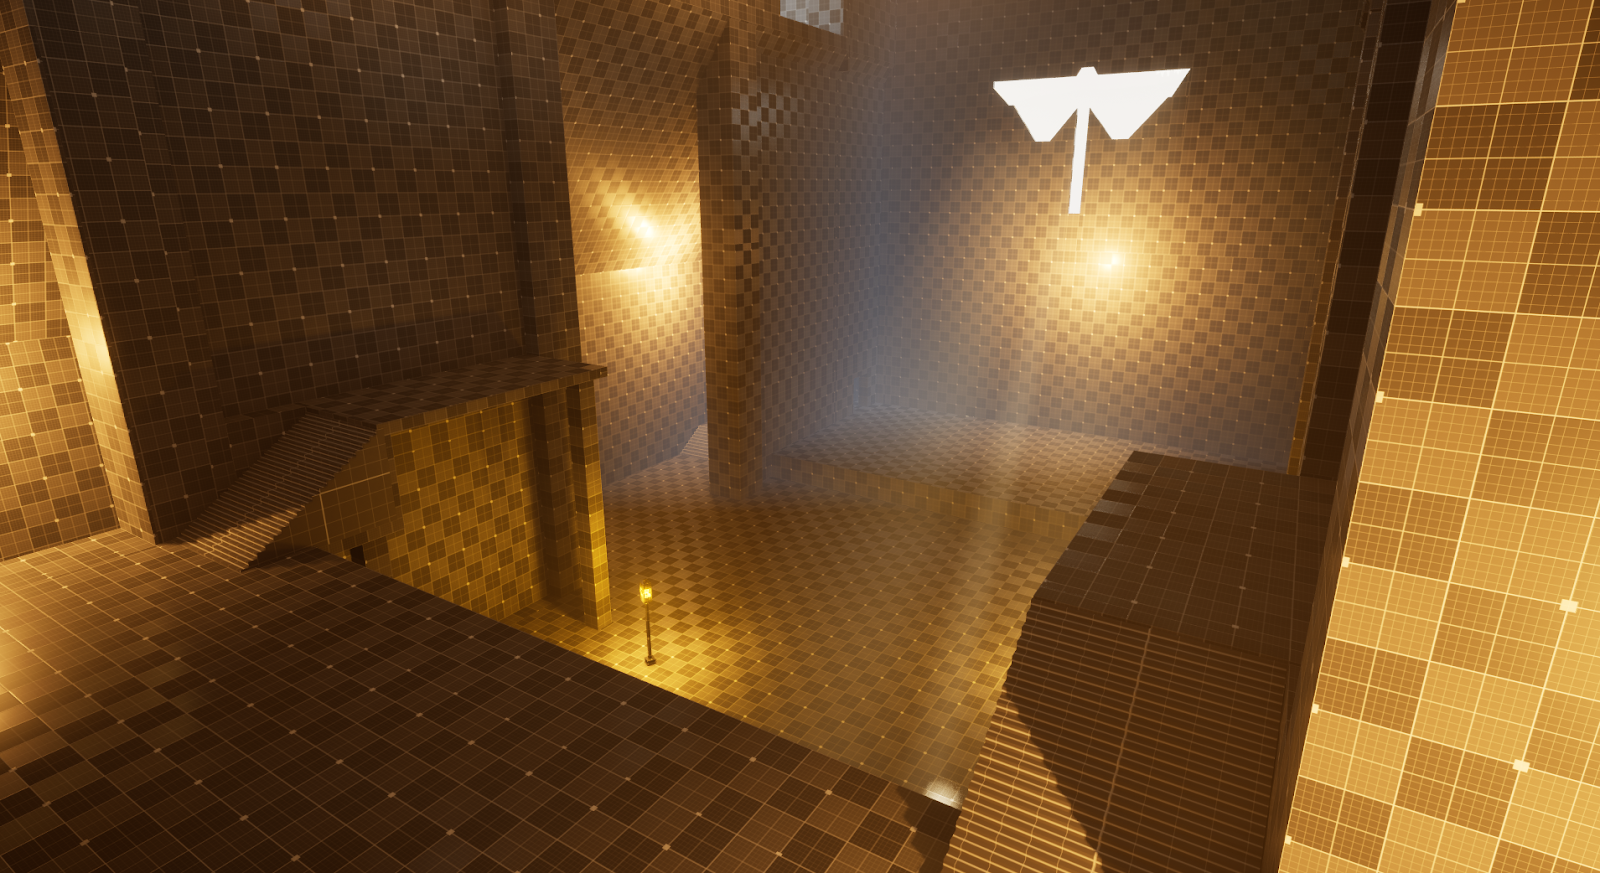
Figure 18. Inside of the church
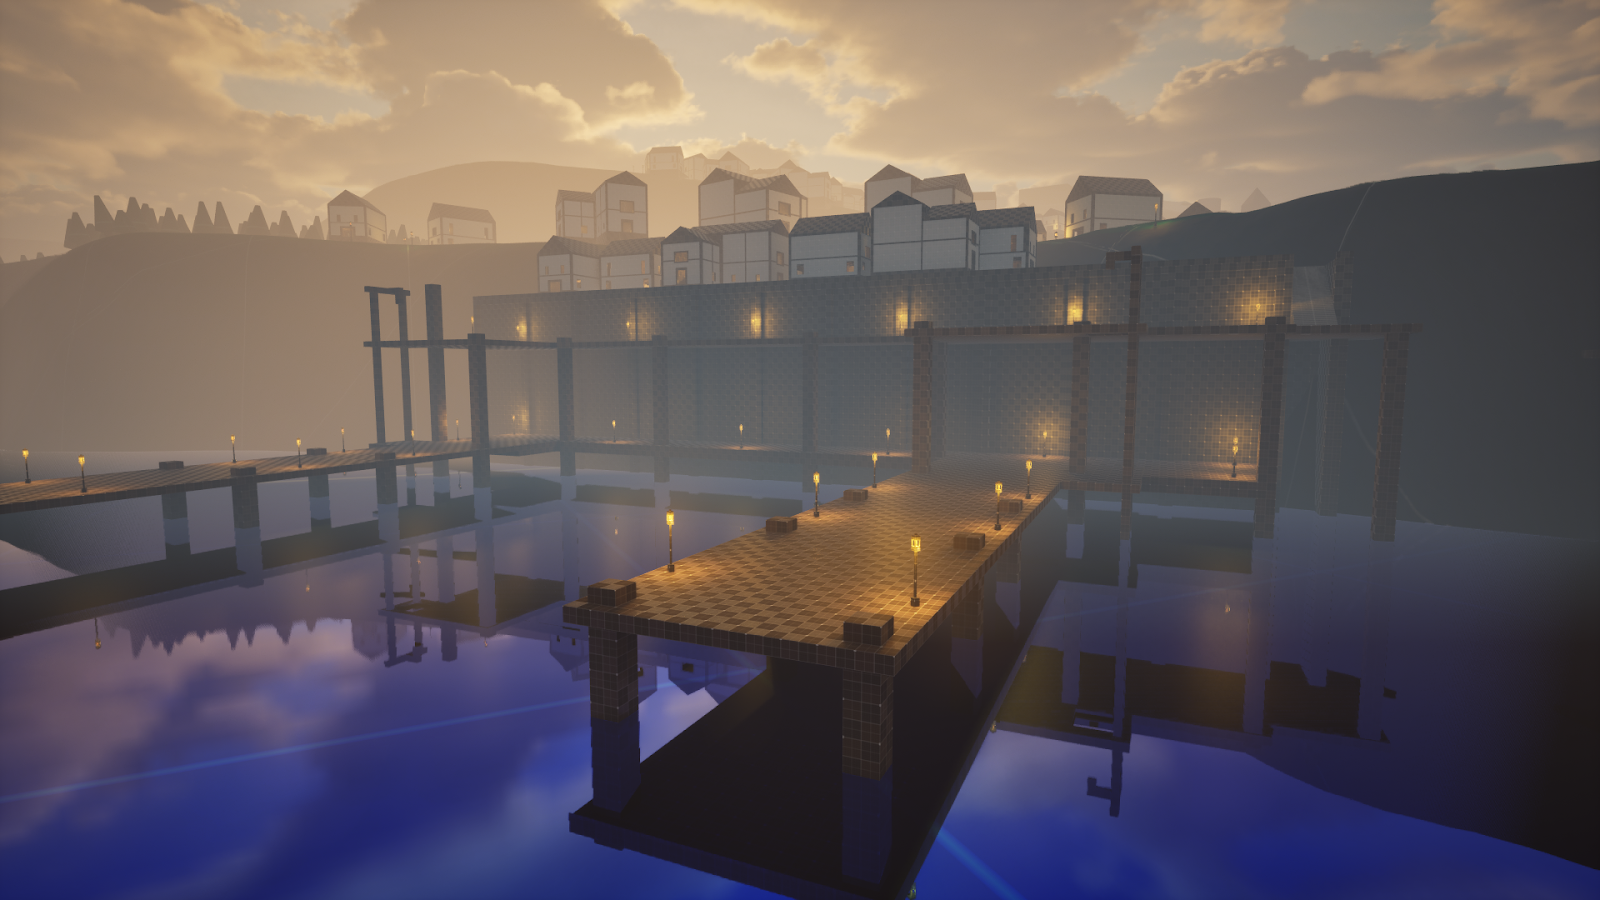
Figure 19. First iteration of the Harbour
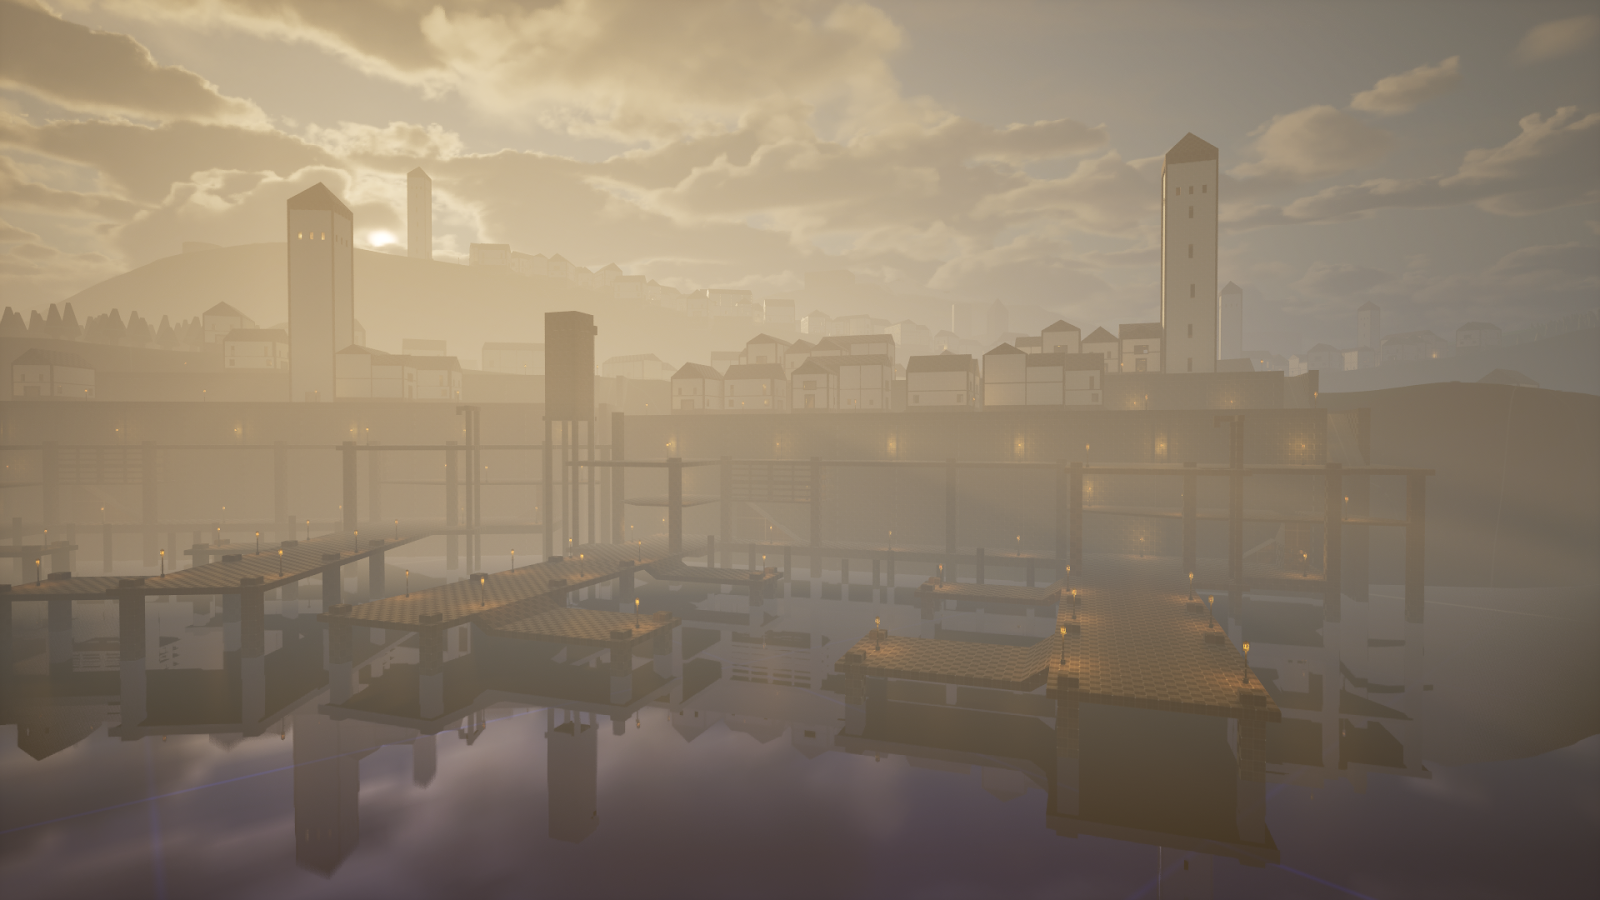
Figure 20. Final result Harbour
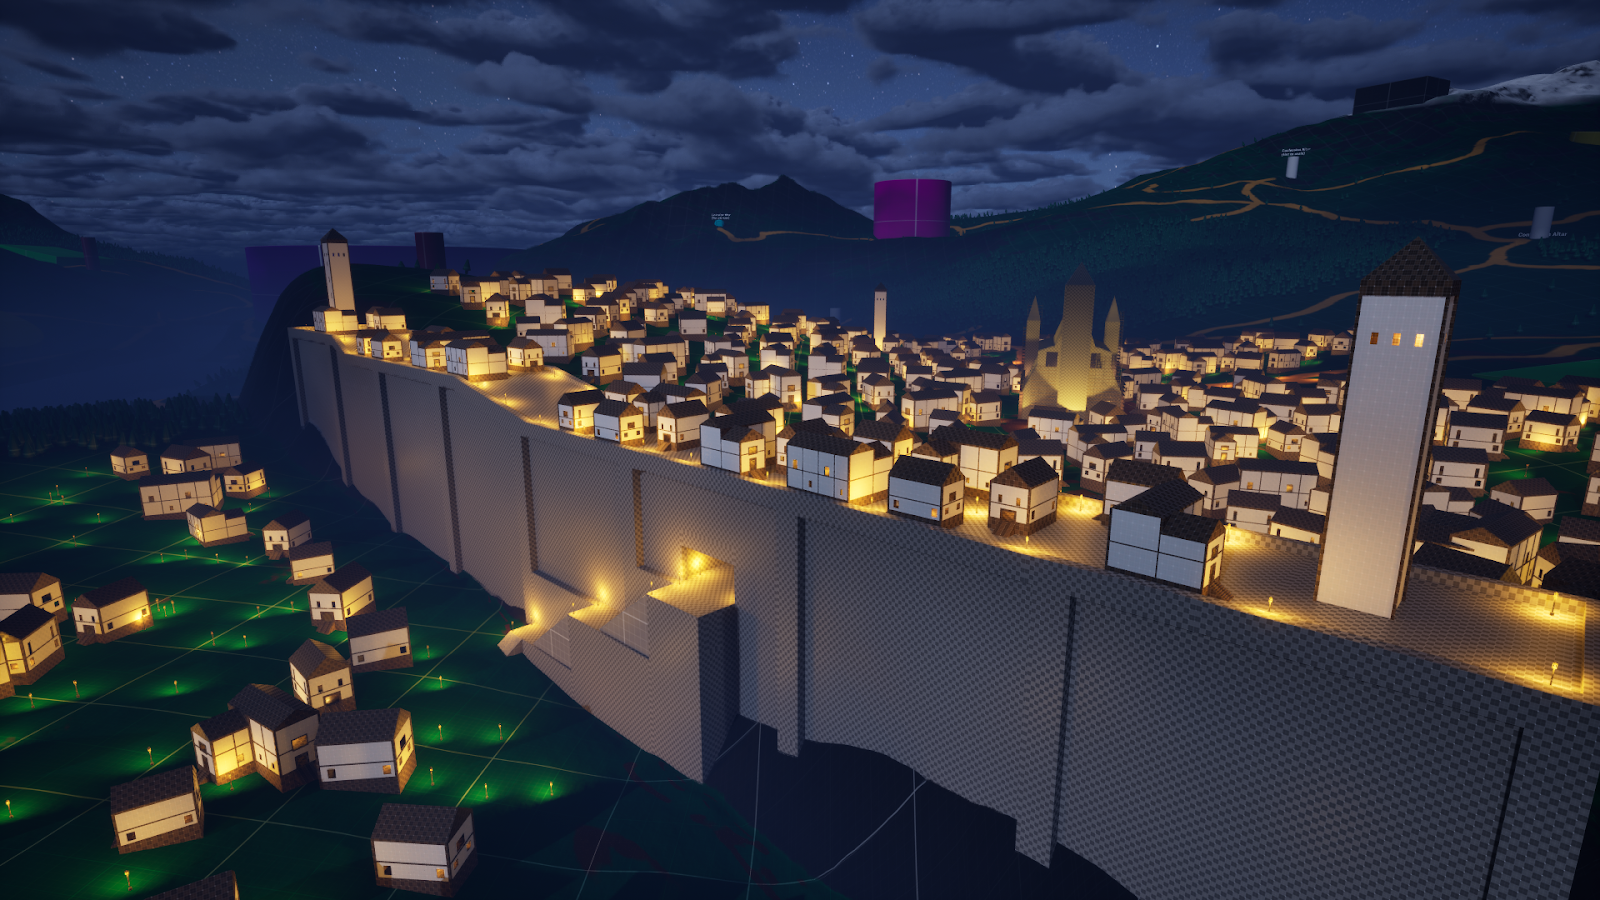
Figure 21. City wall connecting upper and lower area of the town
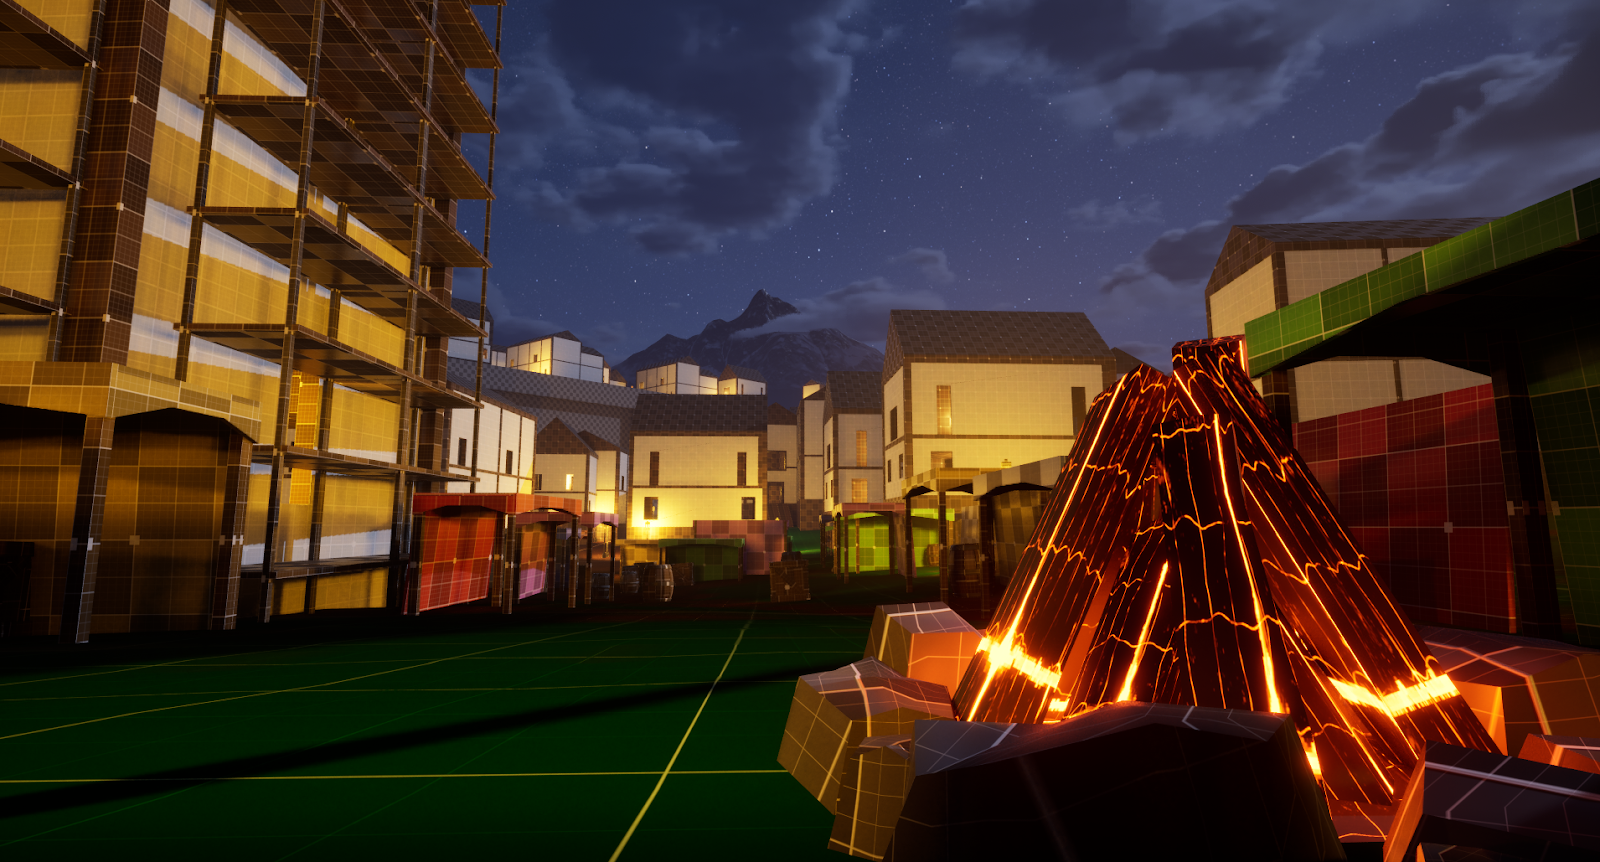
Figure 22. Town now has different market areas
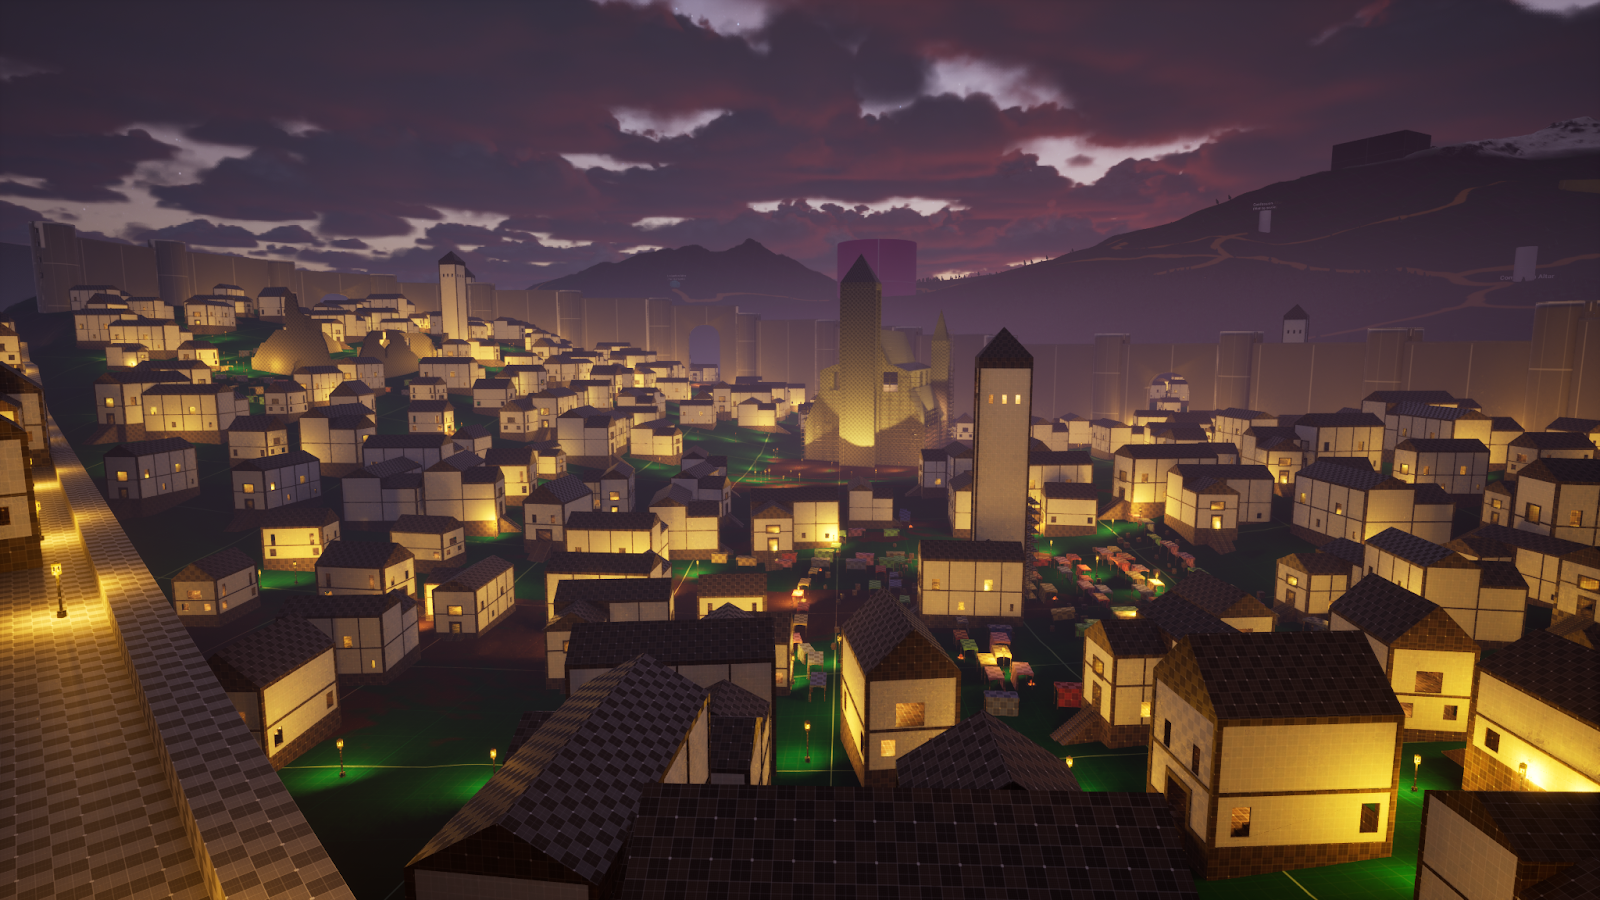
Figure 23. Town walls
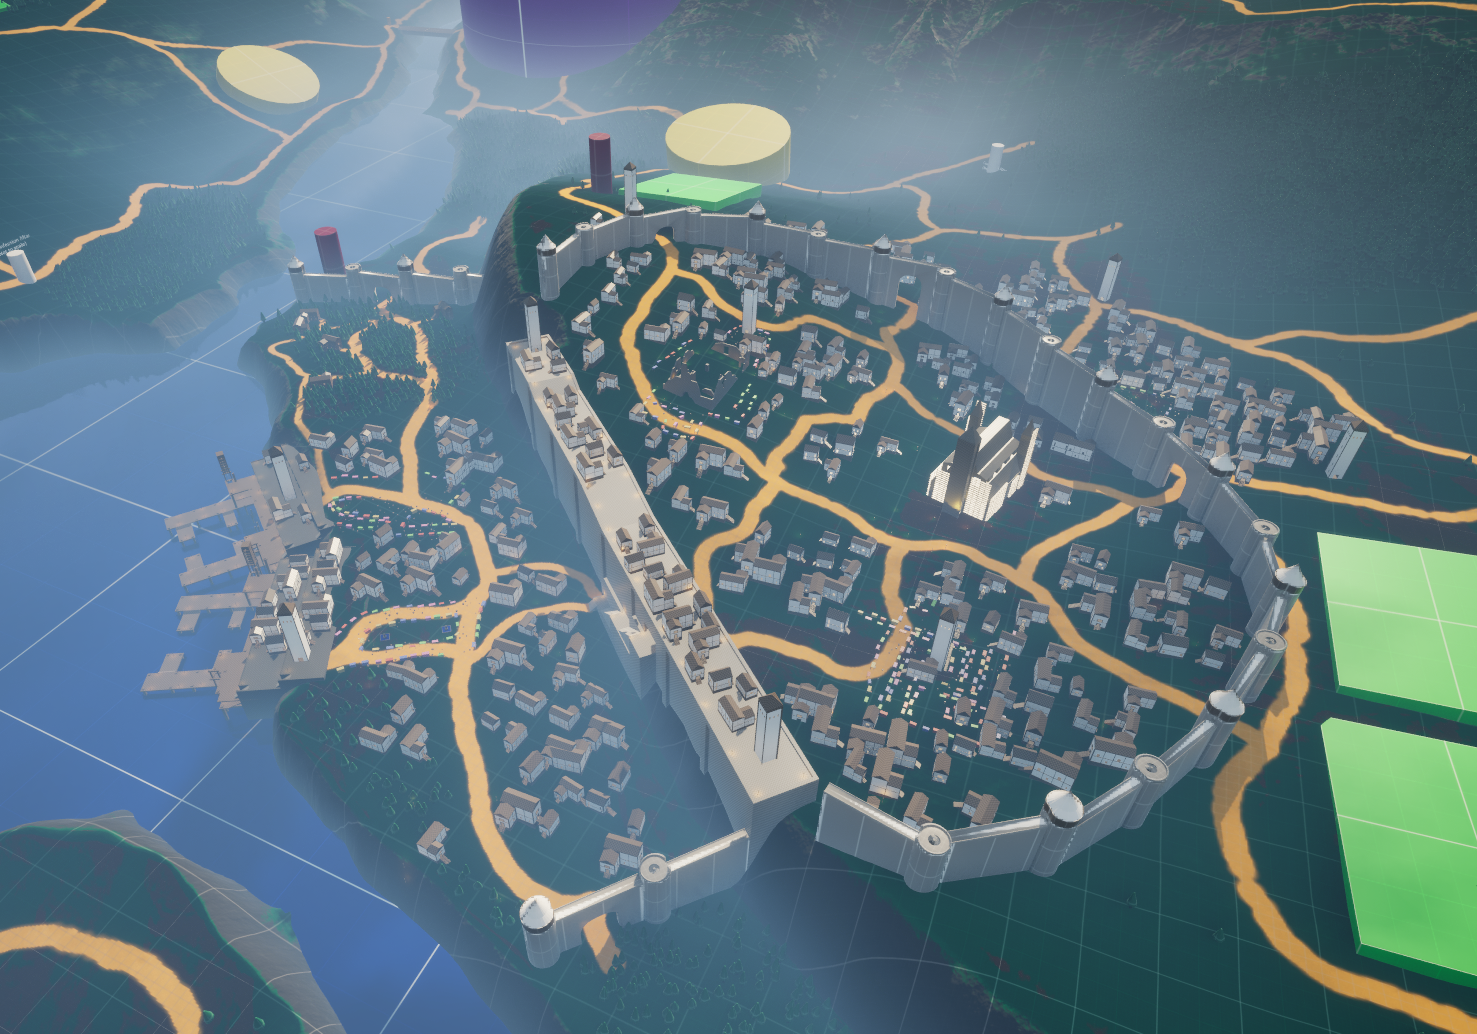
Figure 24. First Playable, River Town!
The development of River Town took around 3 weeks, and has been playtested. One of the main pieces of feedback was the house placements and the feel of houses in town. At the moment, it mainly feels like random blocks placed around, most likely because that was the case. So for my next steps, I will find a way of making the houses more interesting and the moment to moment walking through more fun. A good way of doing this might be to create more interesting and small houses using modular house kits.
Before reworking River Town, I moved on to creating Ruin Battle Maps. These maps are smaller, more focussed battle areas from D&D translated to 3D. I really needed to work on something else for a small amount of time. I also went on holiday shortly after the creation of the battlemap, so reworking the entire town would take a bit too long.
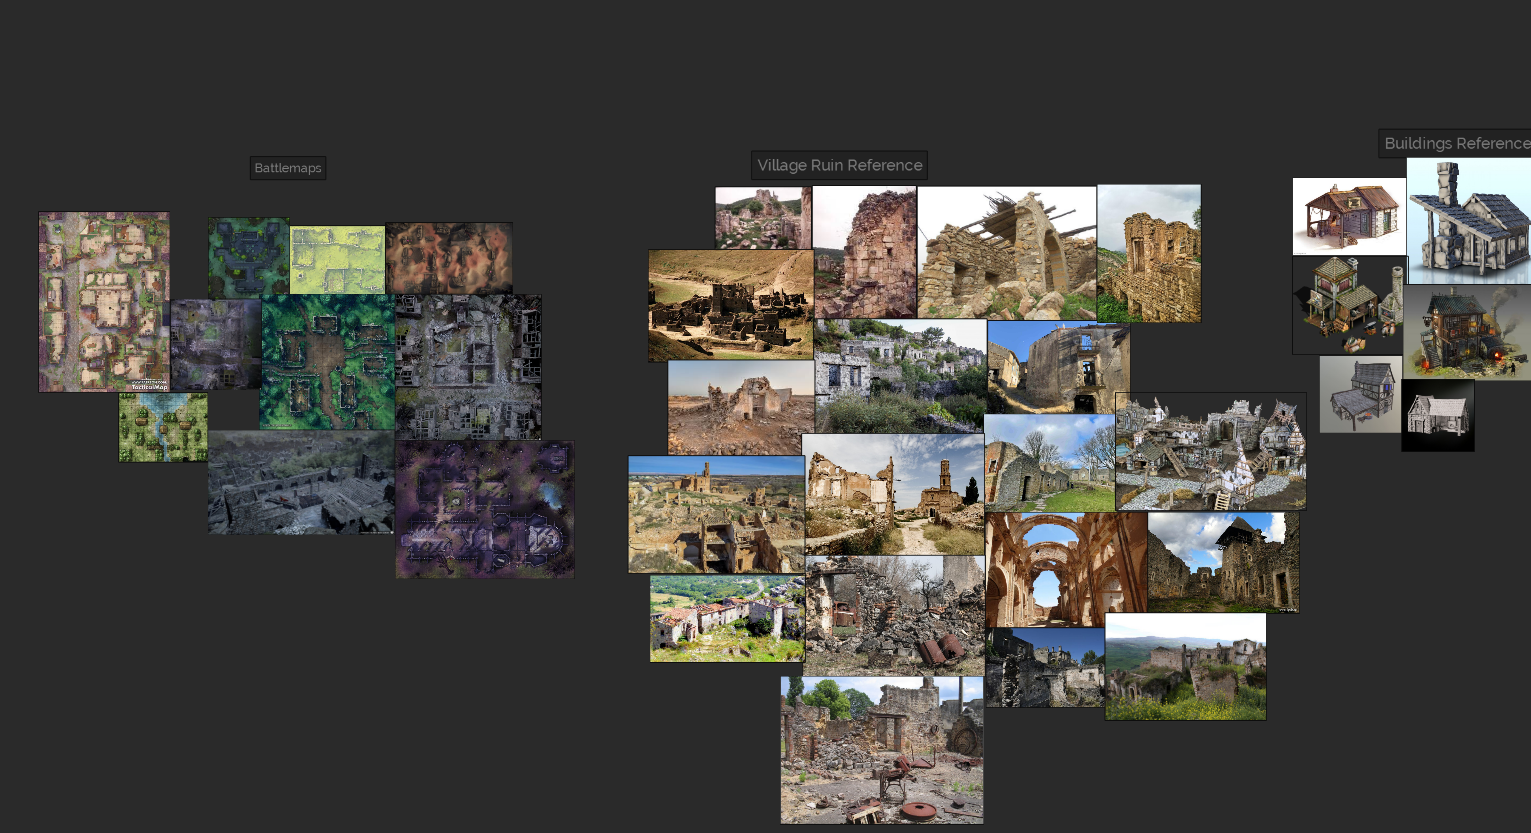
Figure 25. Research into D&D battlemaps and village ruins.
I had never made and played a D&D battle map before. So I did my own research into battle maps and I reached out to an experienced DM in the company. We talked about what makes an interesting map and what to think of when making a battle map. One of the most important aspects was distance, since D&D moves and attacks are limited by range. I also had to keep in mind that this was a map for DMs to customize.
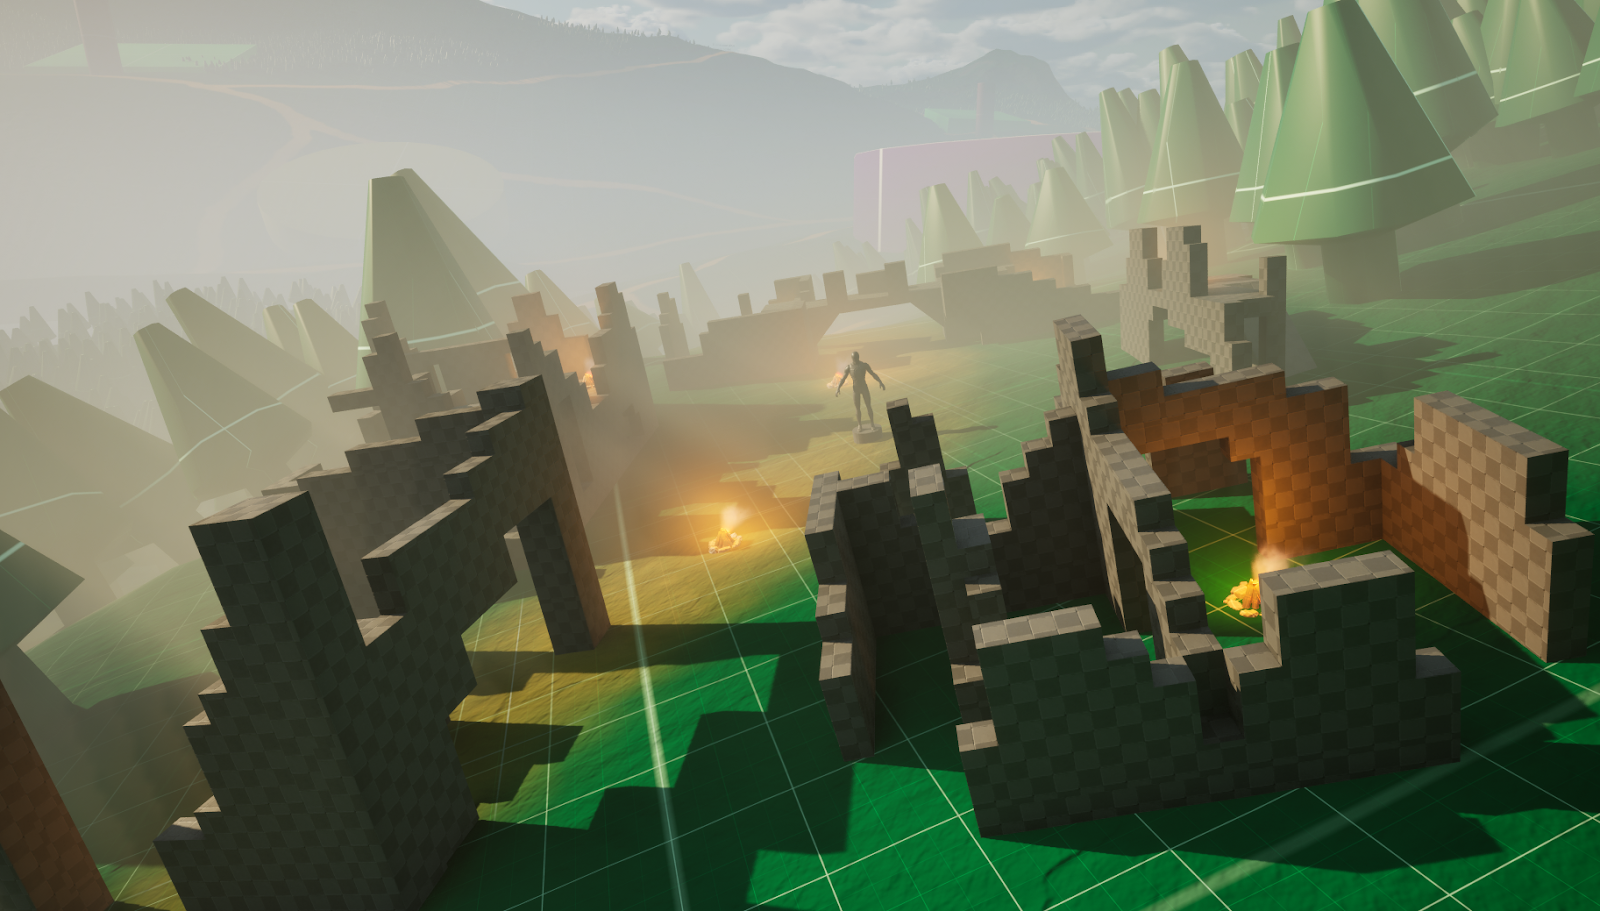
Figure 26. First Iteration Village Ruin
The first iteration of the battlemap was focussed on creating the ruins and placements. My main feedback was about the placements and steepness of the buildings. The team suggested it to have the ruins less steep and have a better foundation, as well as have a better balance between different high ground areas.
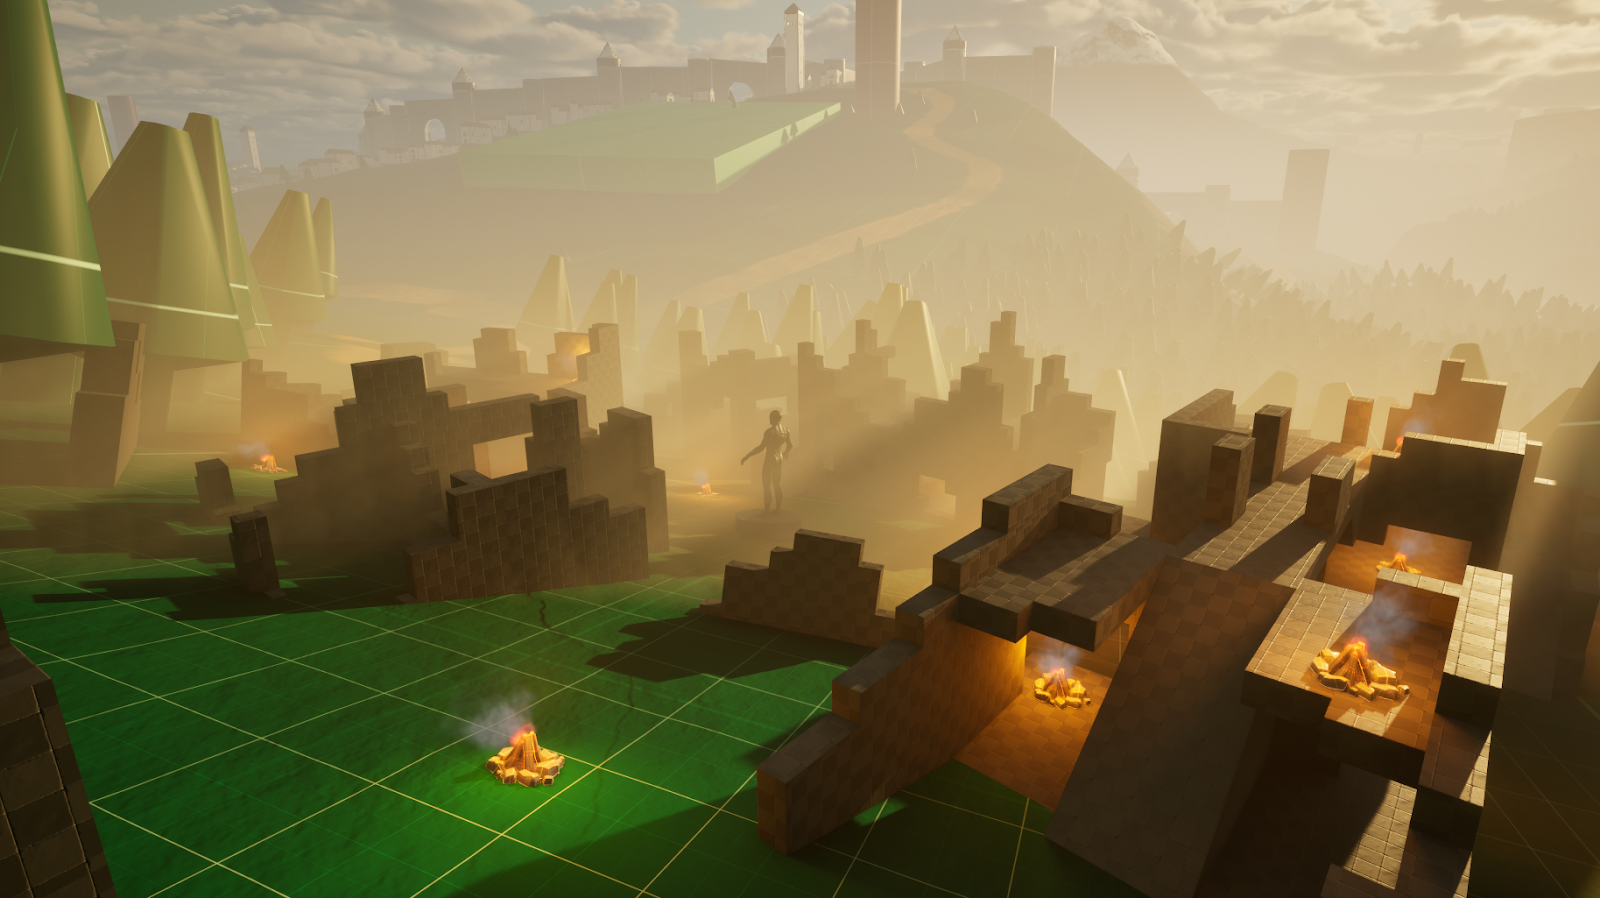
Figure 27. Second iteration Village Ruin
The second iteration fixed most of the issues from the first one and improved on feel. It still has to be playtesting in an actual session. Glaring issues have luckily been fixed before that. I also sat down with the DM again to fix minor issues like
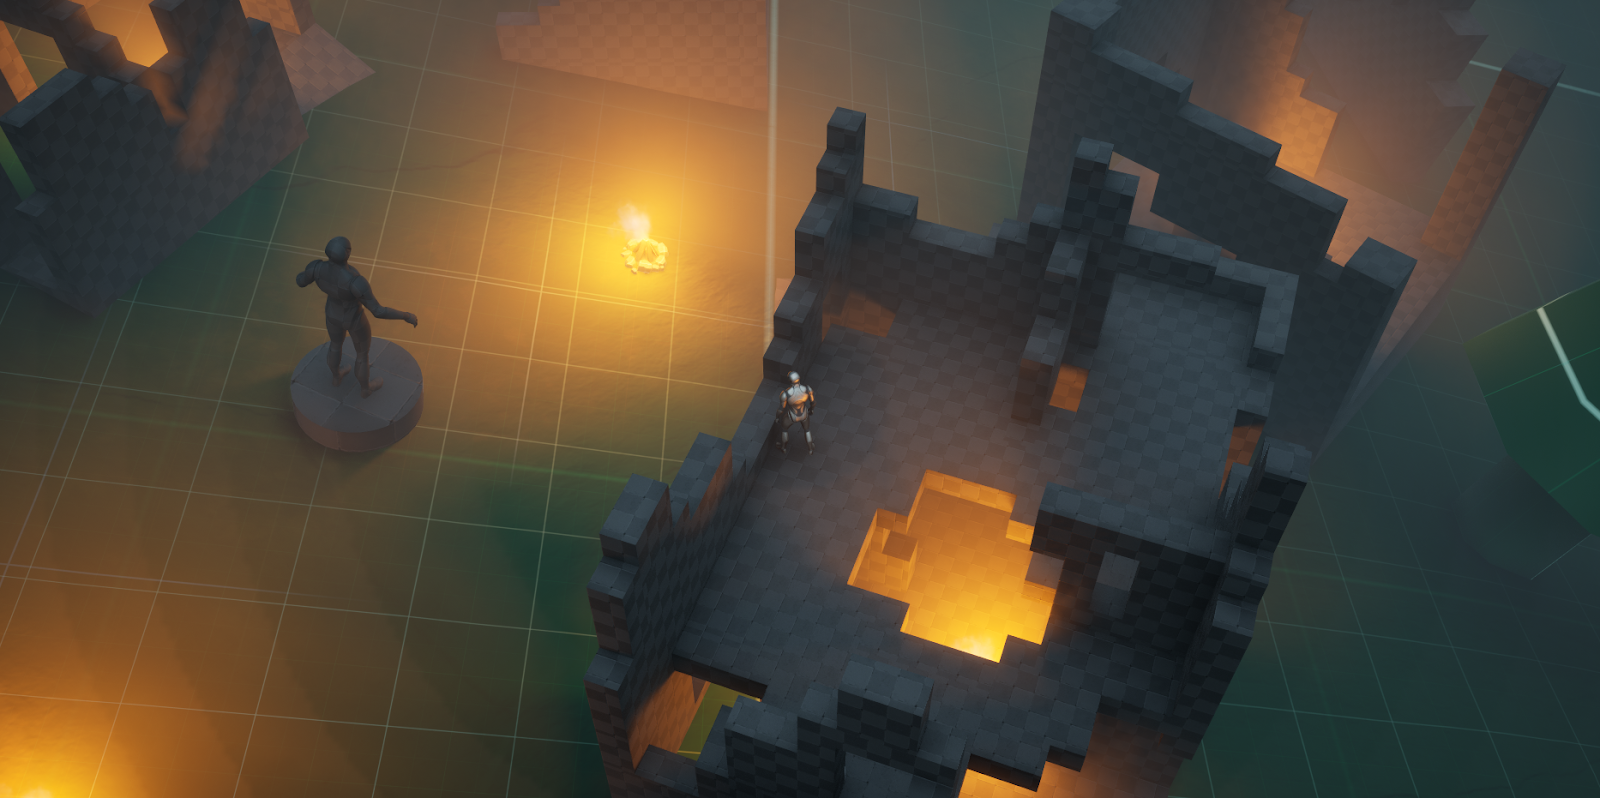
Figure 28. Top down playing view of village ruin.
The battlemap has been designed with and for a top down view, At the moment there is no company template for designing levels with D&D movement. So I imported an Unreal template and made some changes to the system to recreate the movement we have in our game.
After playtests and generally walking around the world, I felt more and more unhappy with how the houses were portrayed in River Town. So I proposed to fix these issues in the next sprint, which was allowed. What I mainly wanted to fix was the PCG-feel the city had. River Town felt too random and too spaced out. This needed to be fixed because it made traversal very boring and uninspiring.
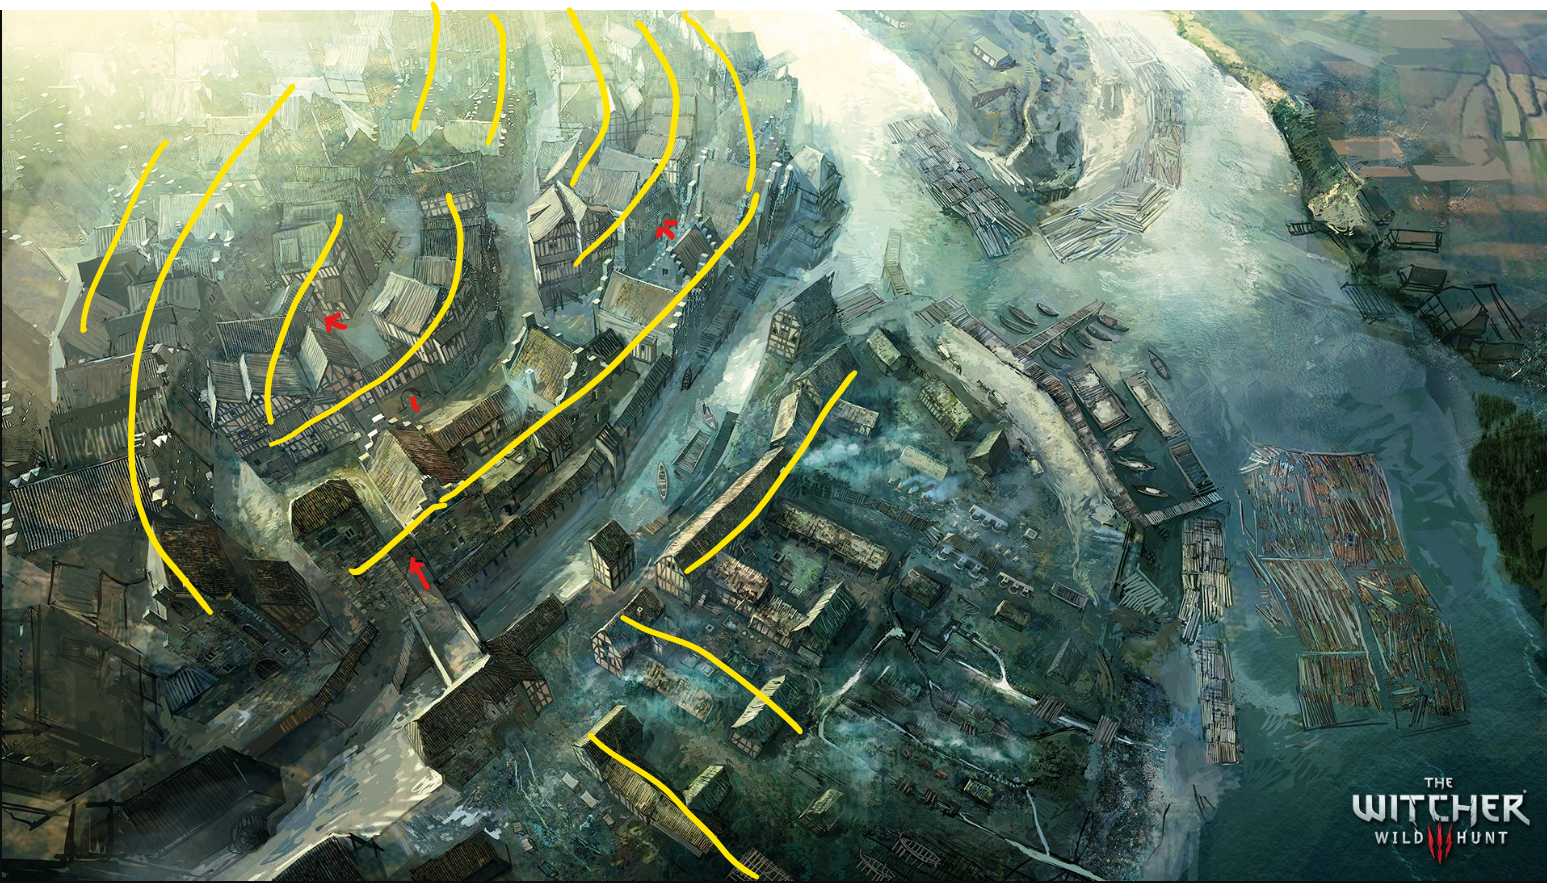
Figure 29. Reference that inspired me to change my design (Witcher 3: Wild Hunt, 2015)
Figure 29 made something click in my mind. In the old version I spawned the houses randomly and cut through them to create the streets. Figure 29 showed me a different approach, the houses acted more as walls in this picture. This approach made a lot of sense in my mind, so I started working on a custom modular house spawn system, not using PCG. When I made my PCG system it felt like I was fighting Unreal to get what I want, this motivated me to create my own system. In this system I could create a line where houses would spawn on, this way I could create walls made of houses and create more organic streets.
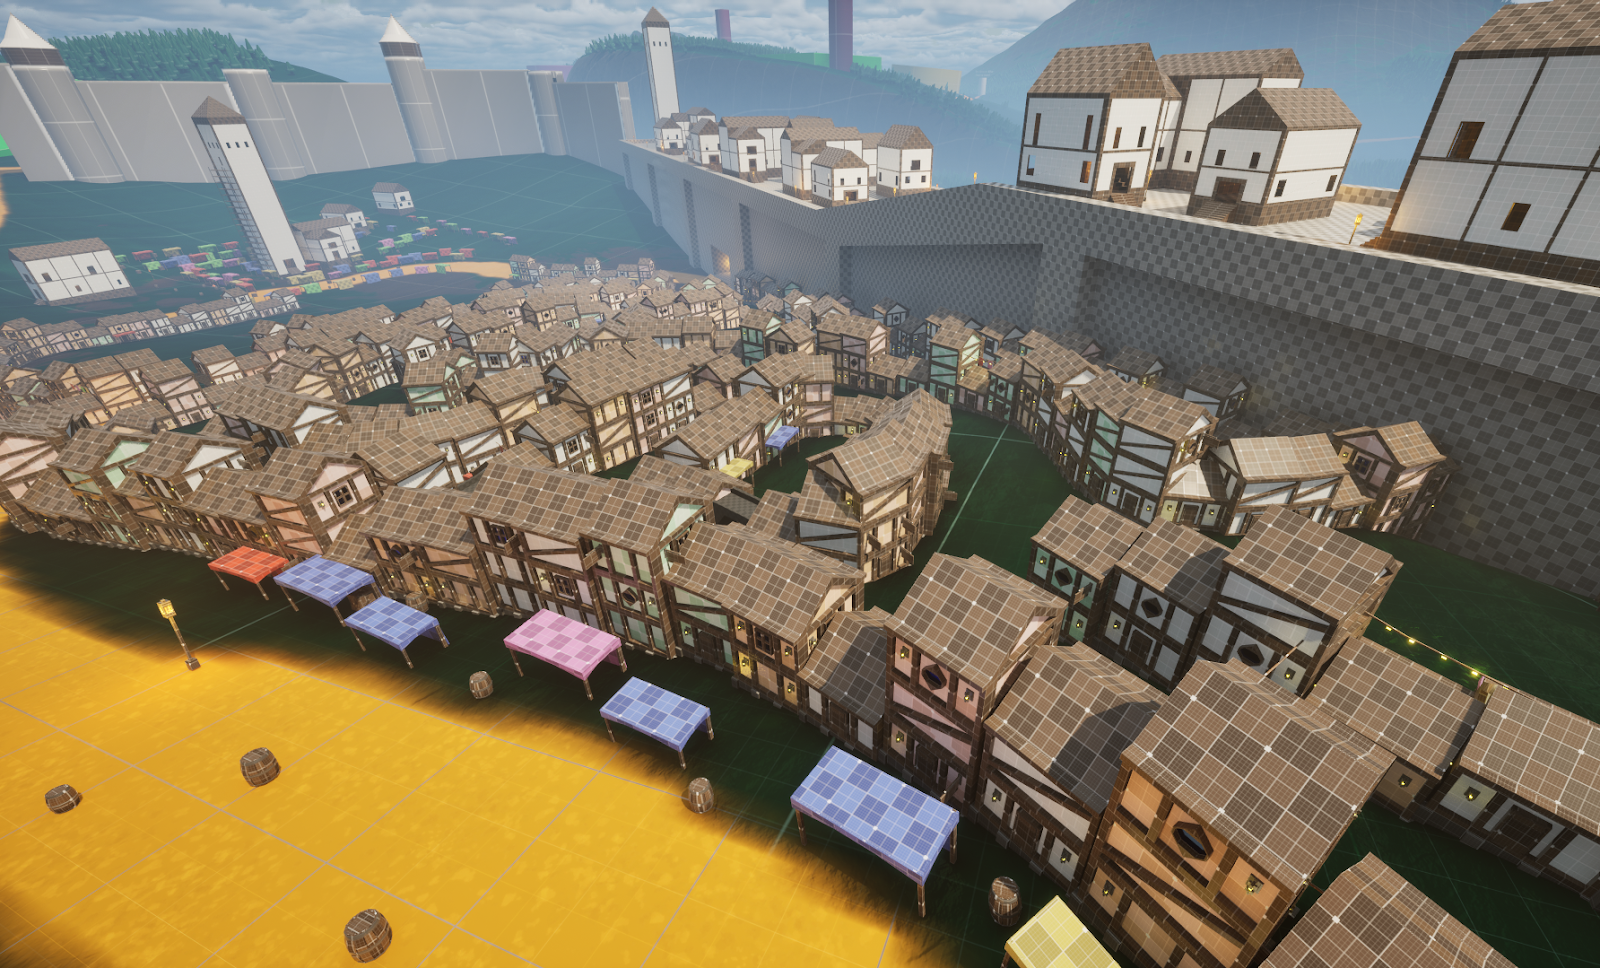
Figure 30. Overview of the modular house system in place.
I also added modular decorations to the houses as well to create a more interesting and varying traversal experience!
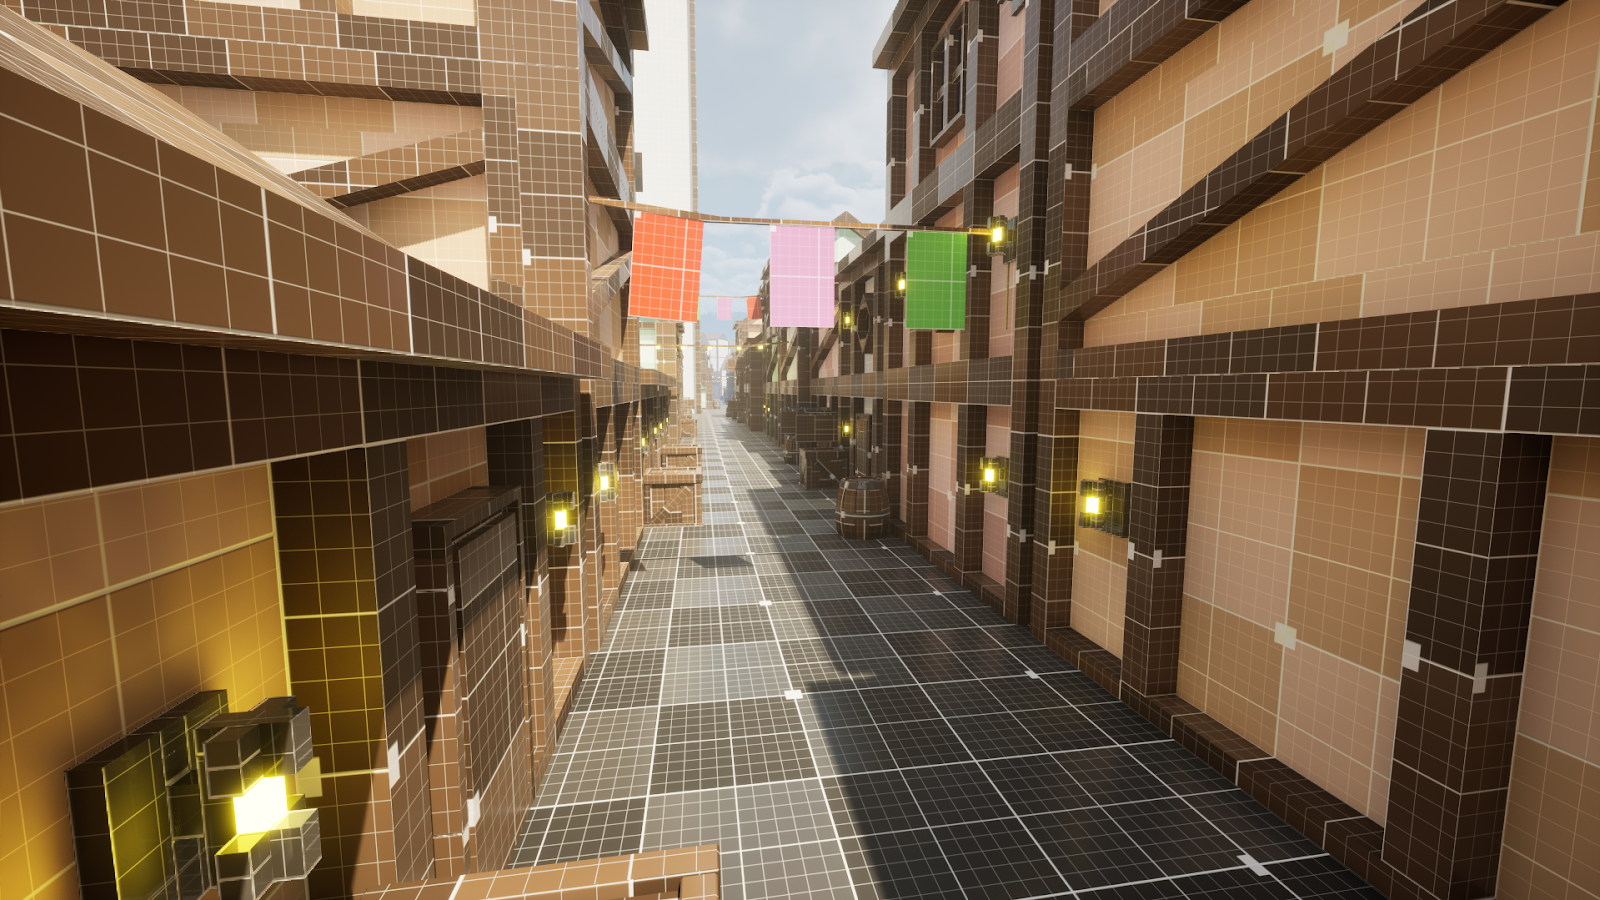
Figure 31. Better showcase of decoration on the houses.
After the houses were improved, I was needed elsewhere in the form of a castle design. Every medieval town had a Keep, this is a place where people would hide in case of an invasion. I was tasked with creating one for River Town. First I had to find the right place, for this I took a simple screenshot of the area the Keep was going to be and sketched over it.
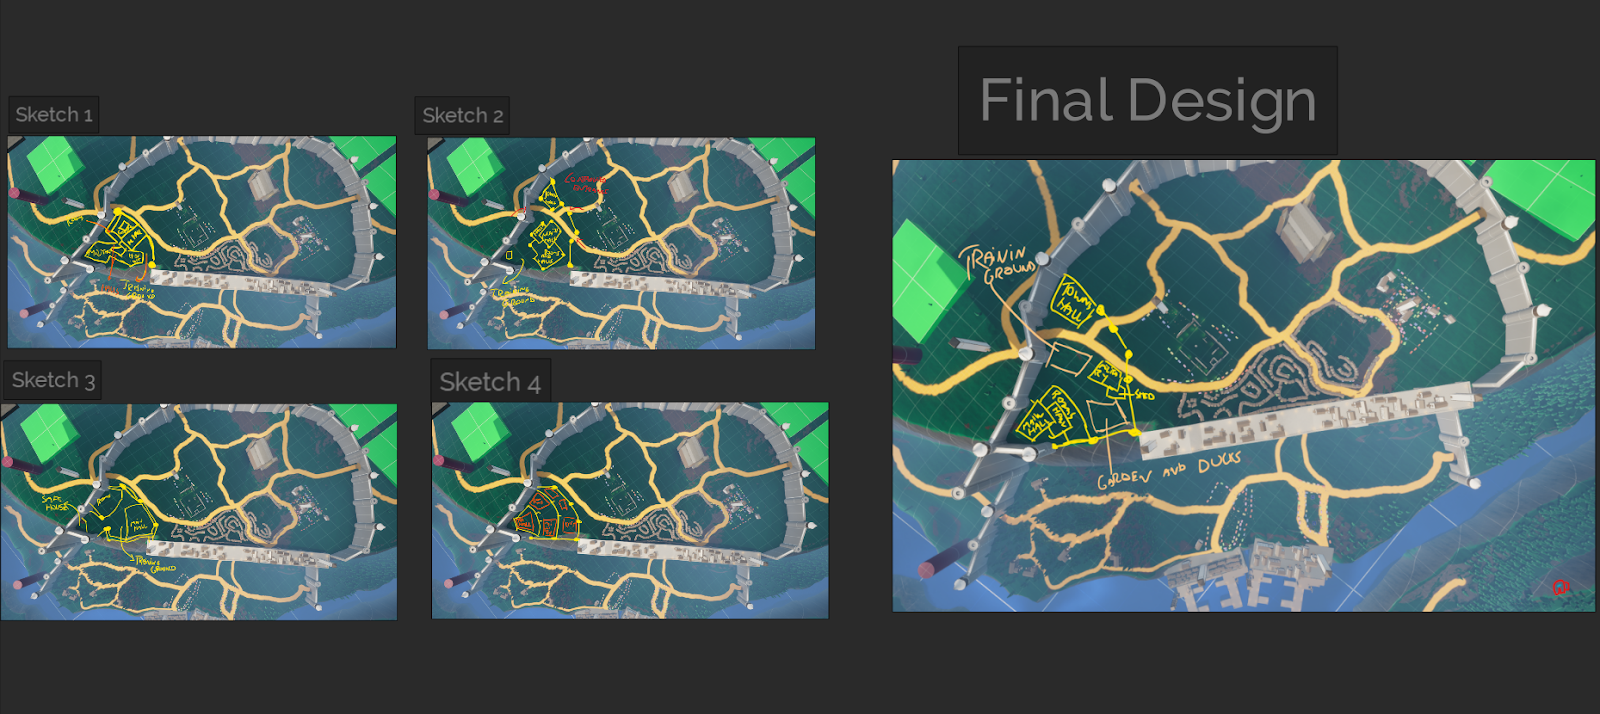
Figure 32. Different Sketches for the Keep location and layout
After the location and layout were decided by me and the team. I moved on to creating the blockout for scaling. It took me about a day to get the right scaling and placement for these buildings, sadly I do not have any pictures for this. After the scaling was correct, I moved on to blocking out the individual buildings, creating the; look, feel and flow.
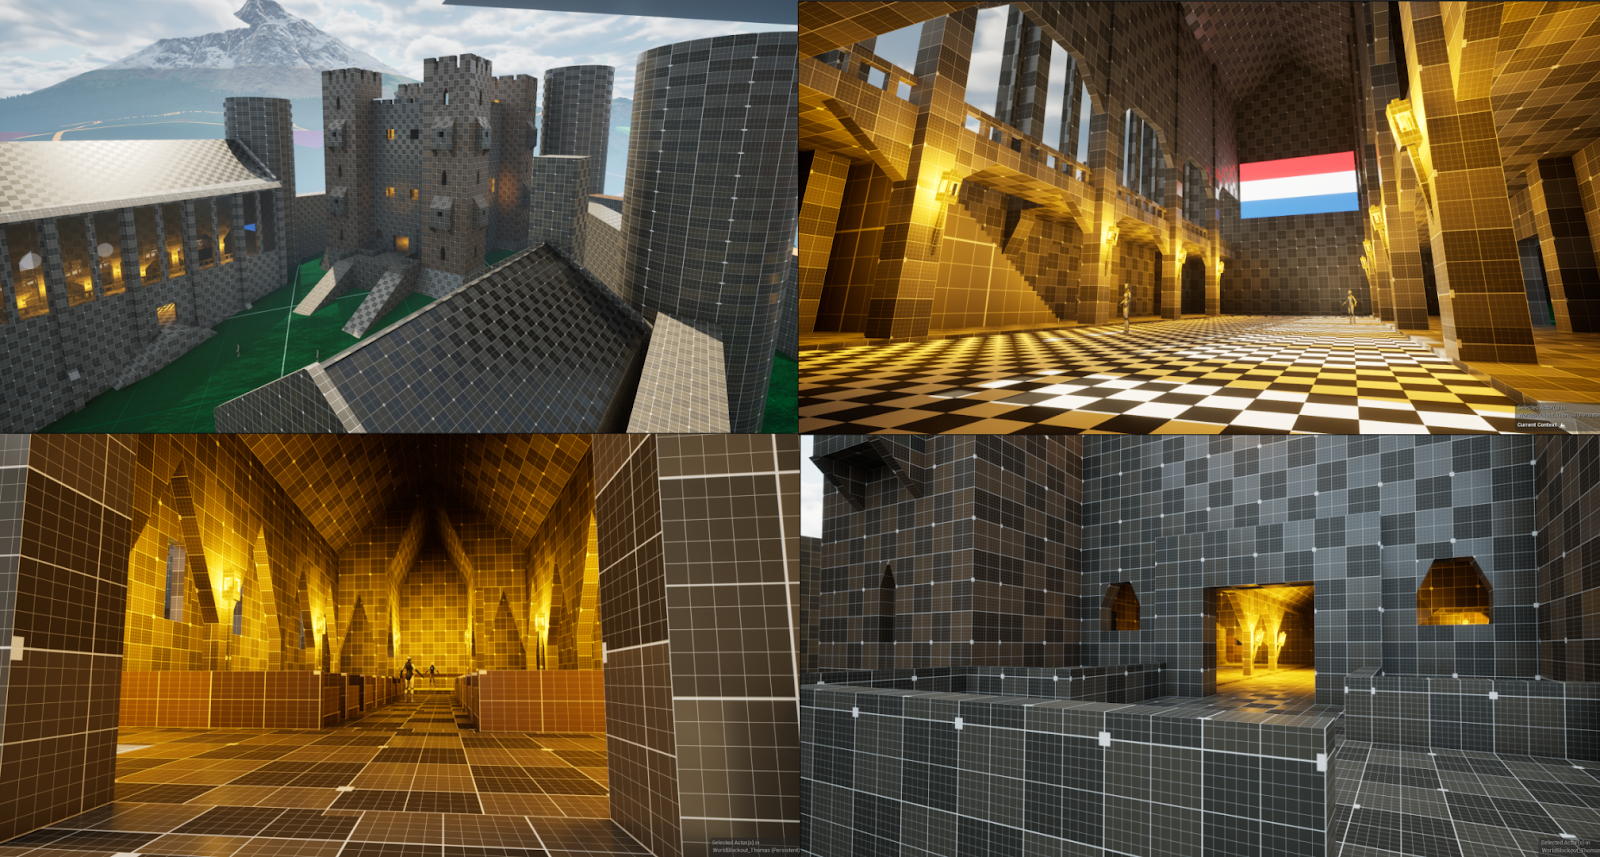
Figure 33. Picture Collection of Keep blockout (Dutch flag is placeholder)
These high-level blockouts were created in two days, with a clear goal. This internship has given me plenty of opportunities to practice my workflow. A past version of myself would’ve immediately jumped into Unreal to create a blockout. This version of myself gathered more information and created a clear plan before blocking out, resulting in a better product.
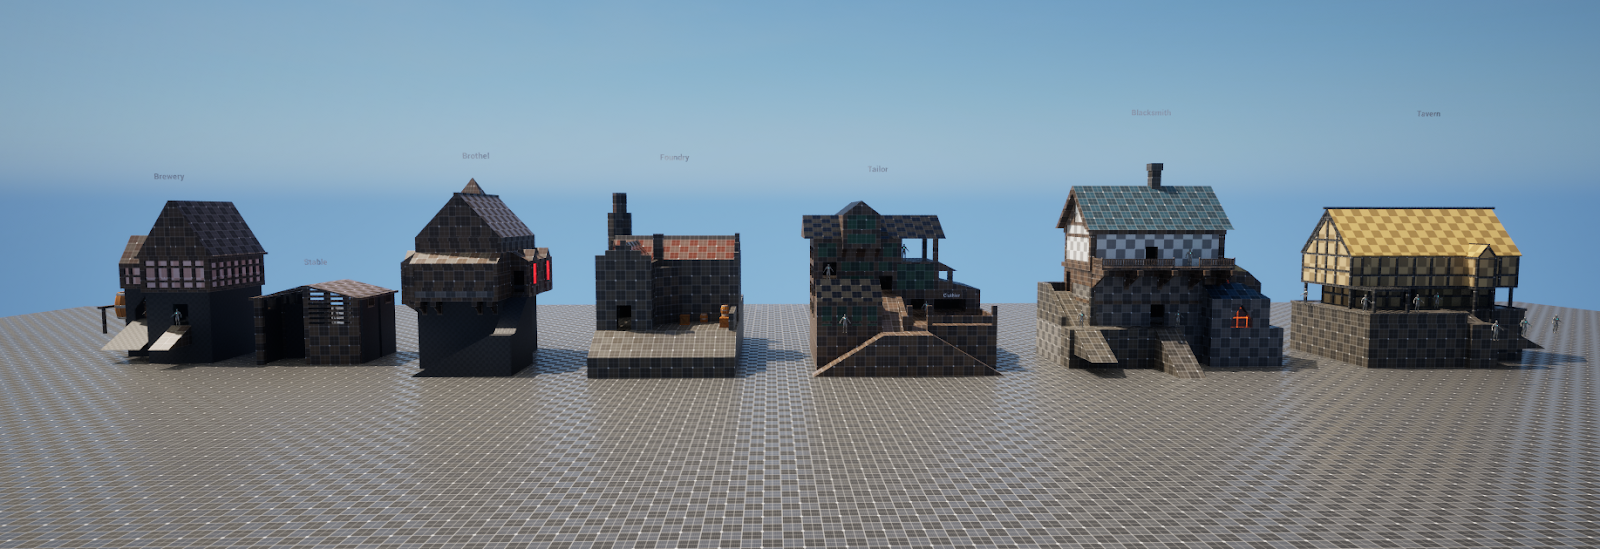
Figure 34. Blockouts for special houses
After the castle area was done I moved on to create the “special houses” in blockout. These buildings are the interesting visiting locations in the town, the point is to scatter them around the town and guide players to these interesting locations.
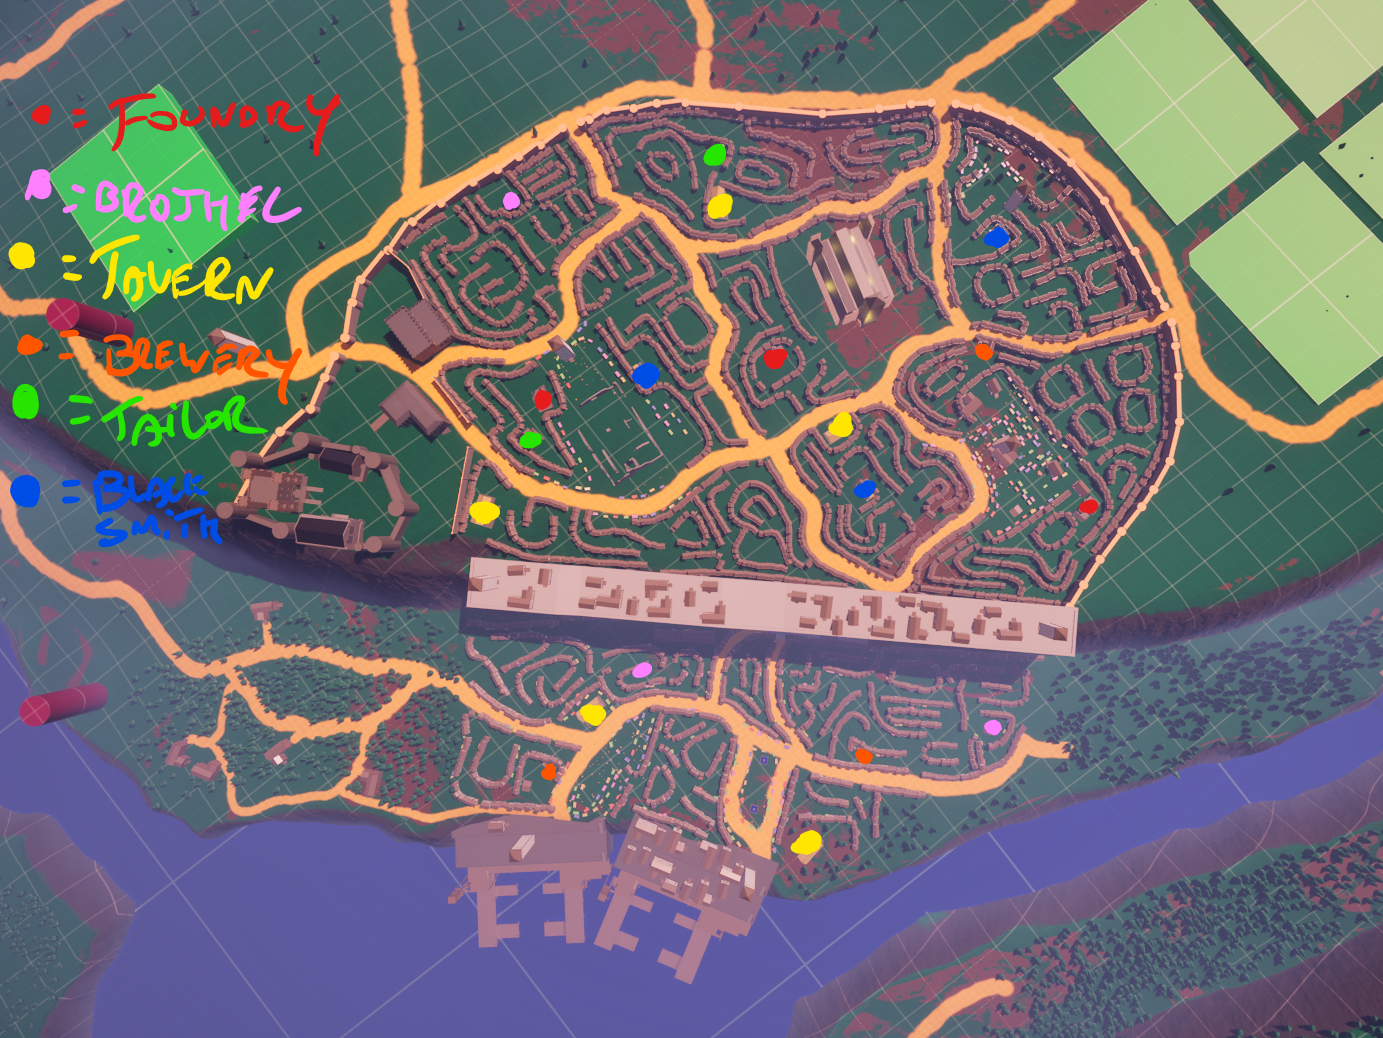
Figure 35. Layout of River Town with special houses
I placed the special houses quite scarcely to make them feel more interesting and unique. They have reasoning for being at certain places. For example; Tailors near the richer areas, Taverns near the main road and brothels at the harbour ;p. They still have to be tested.
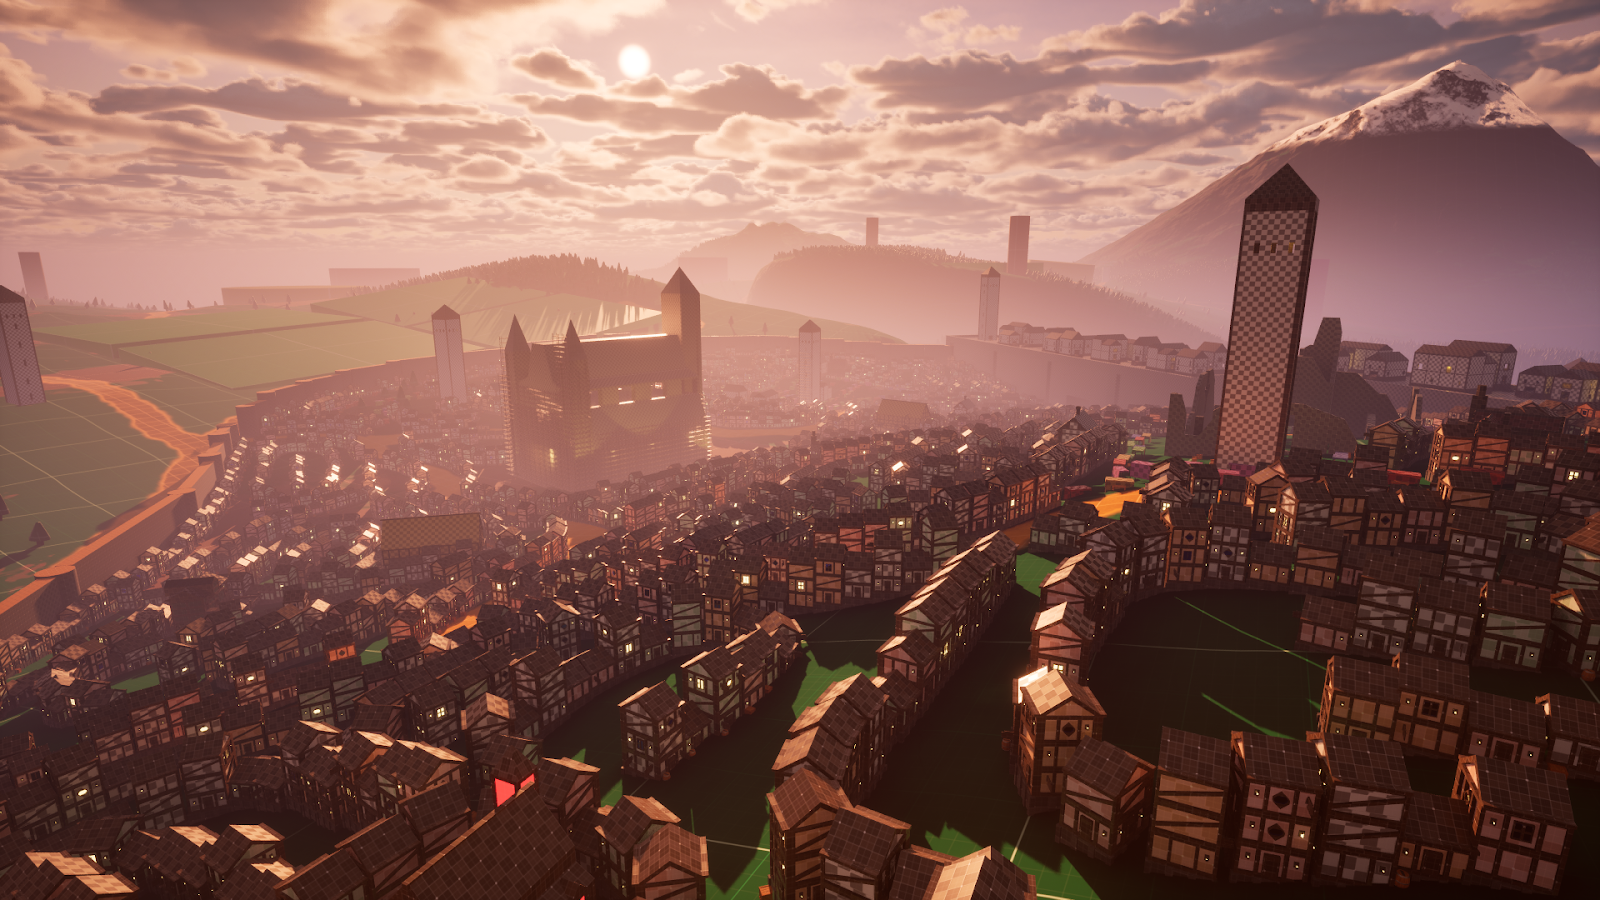
Figure 36. Upper area River Town
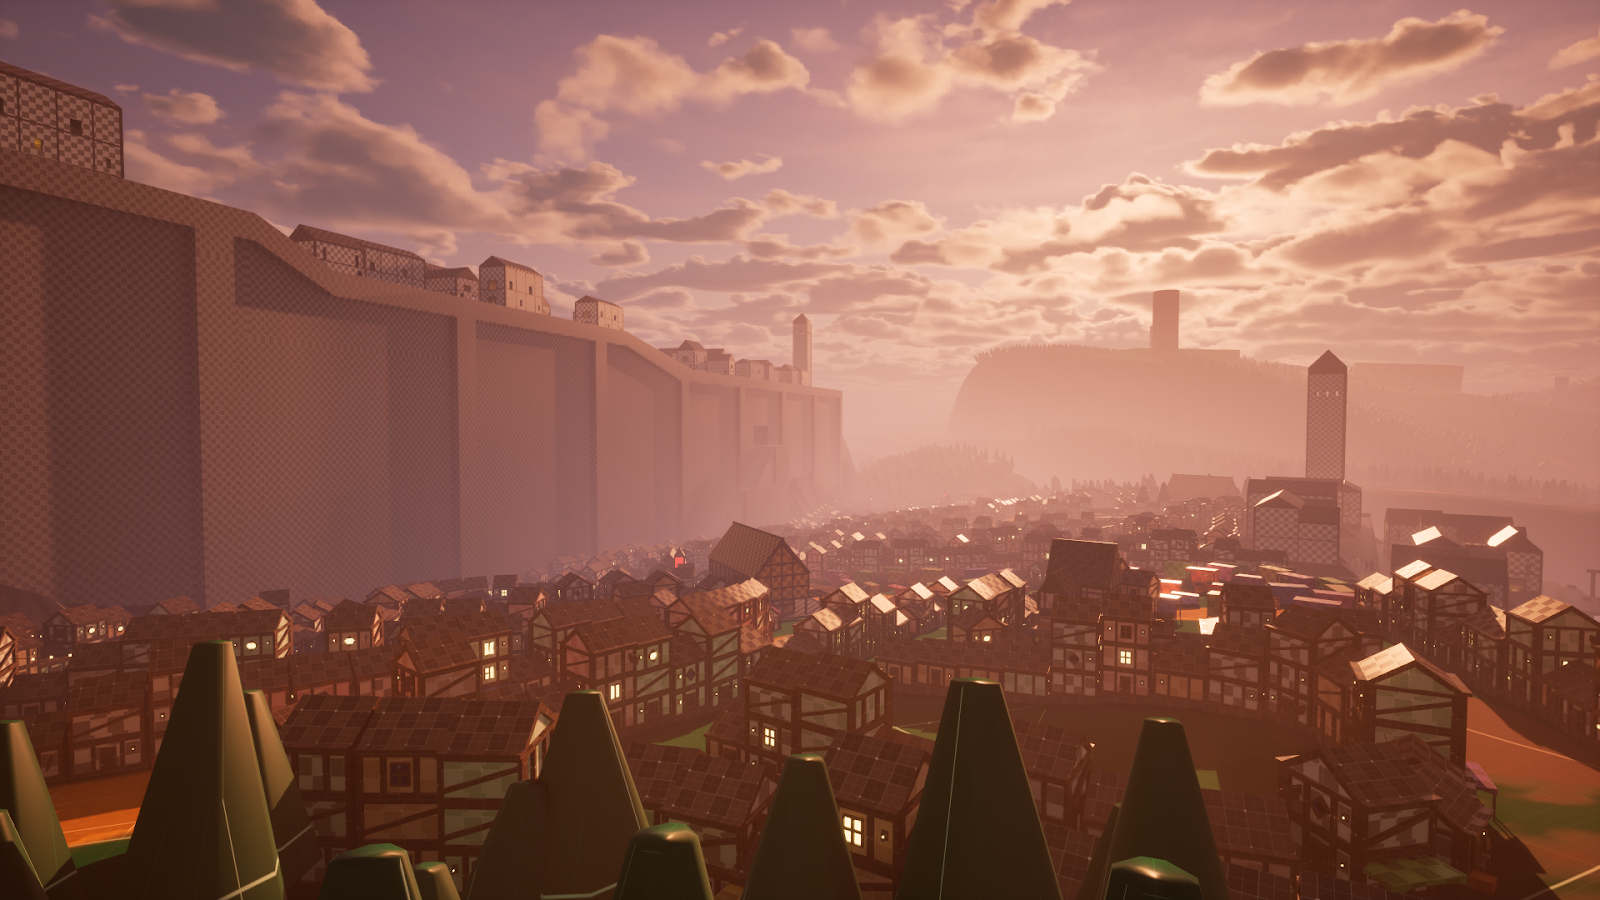
Figure 37. Harbour area River Town
River Town is coming together as an actual town. It has streets, markets, taverns, tailors etc. For roleplaying purposes, this should be enough. Sadly I can’t playtest this version, because at the time of writing this, the internship is coming to a close. So this will be the final version of River Town for me. After making my own systems I have made documentation for those systems, in case interns after me want to use them as well.
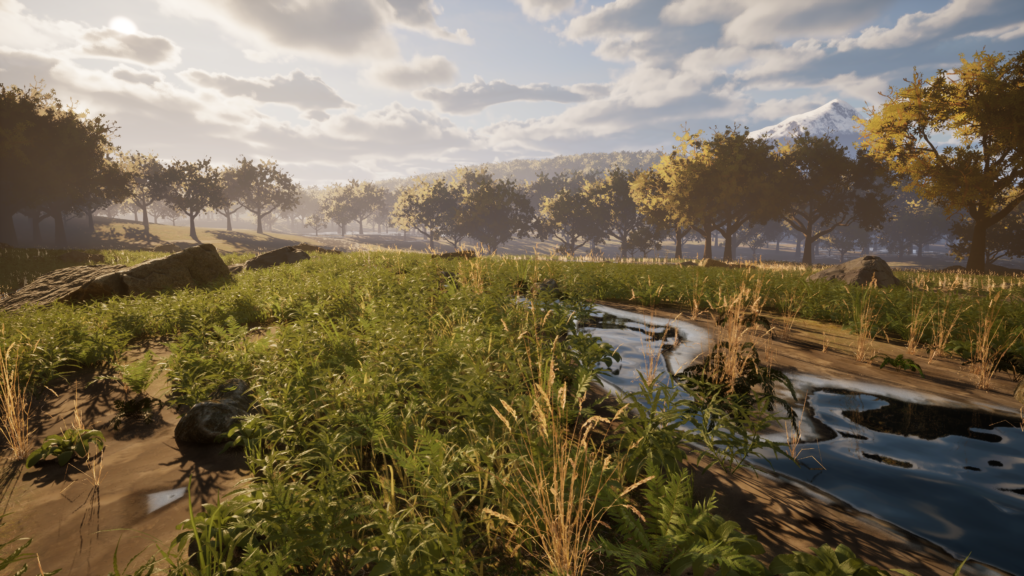
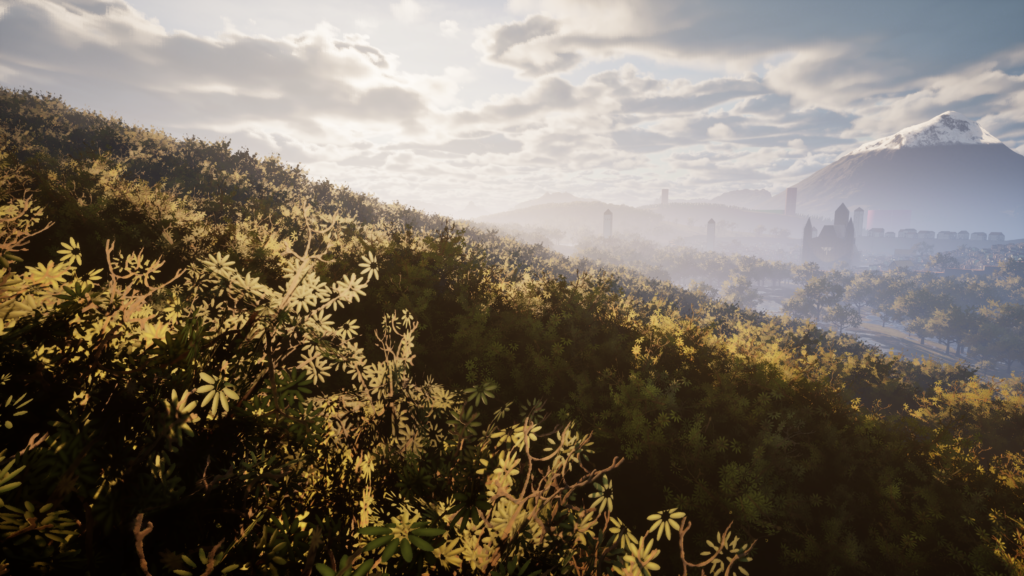
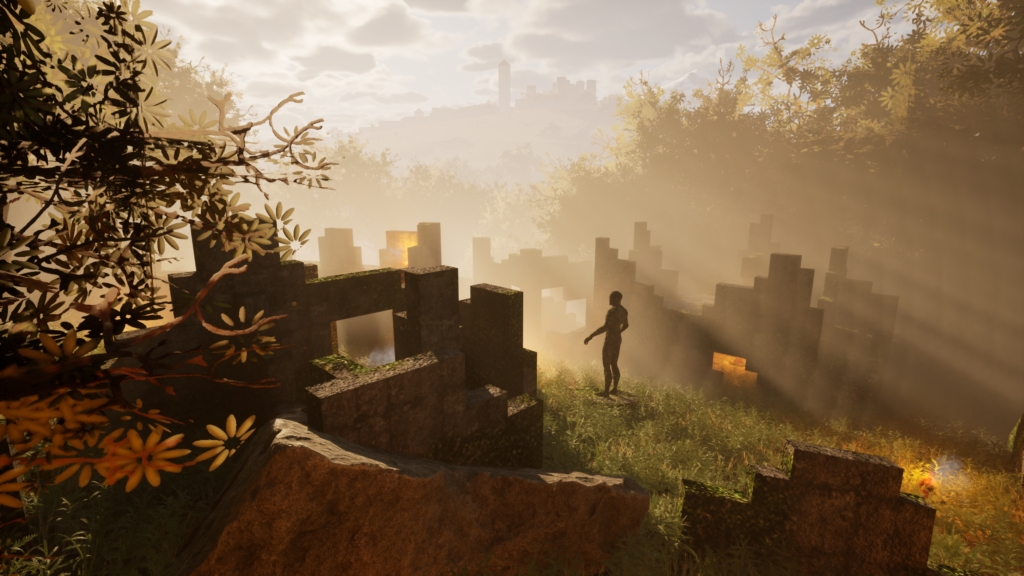
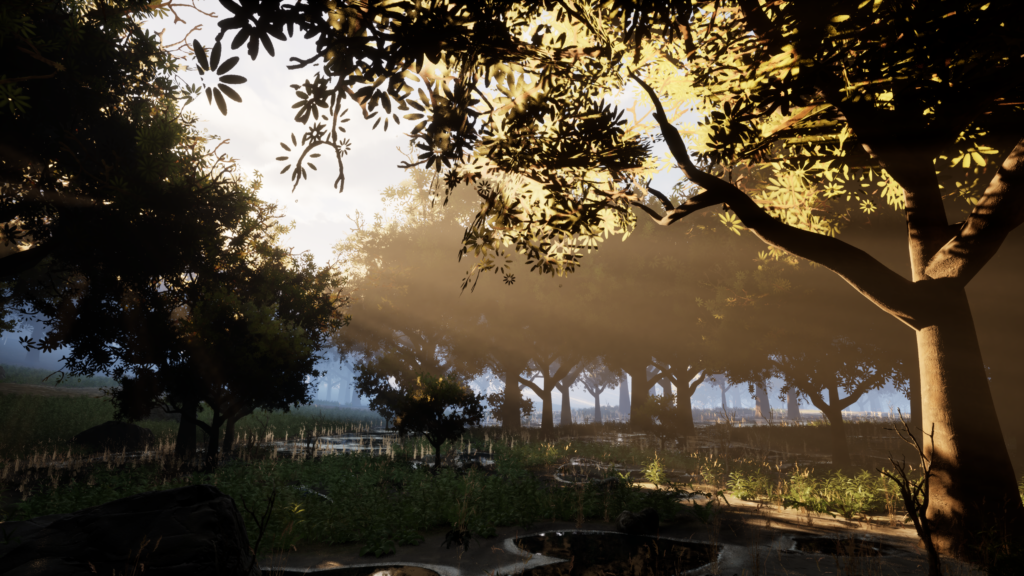
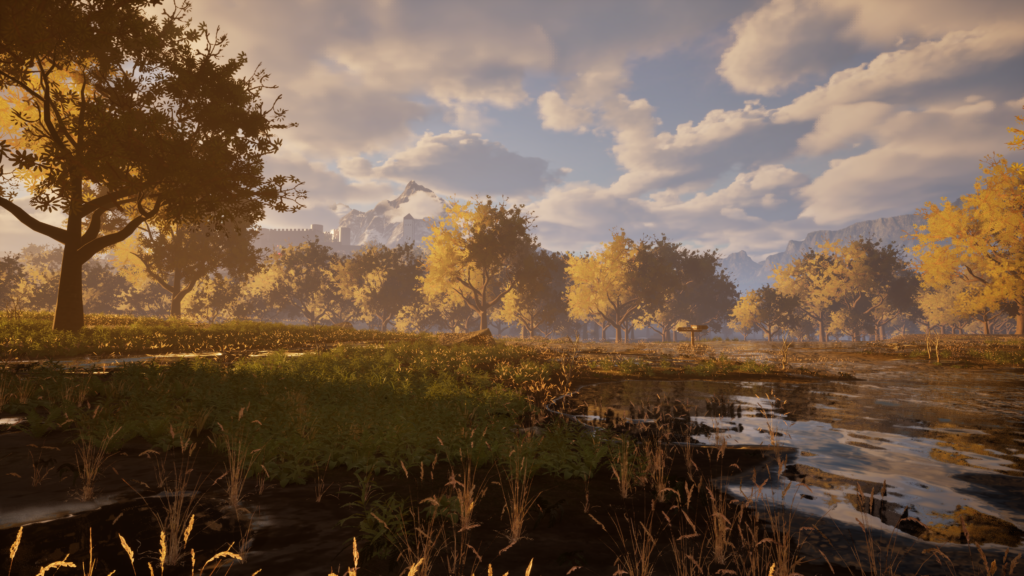
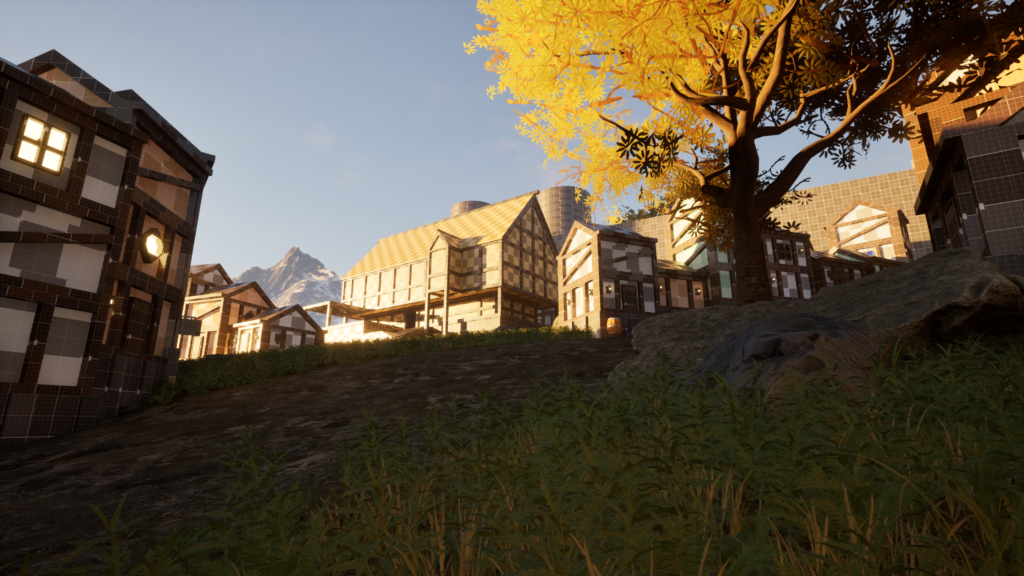
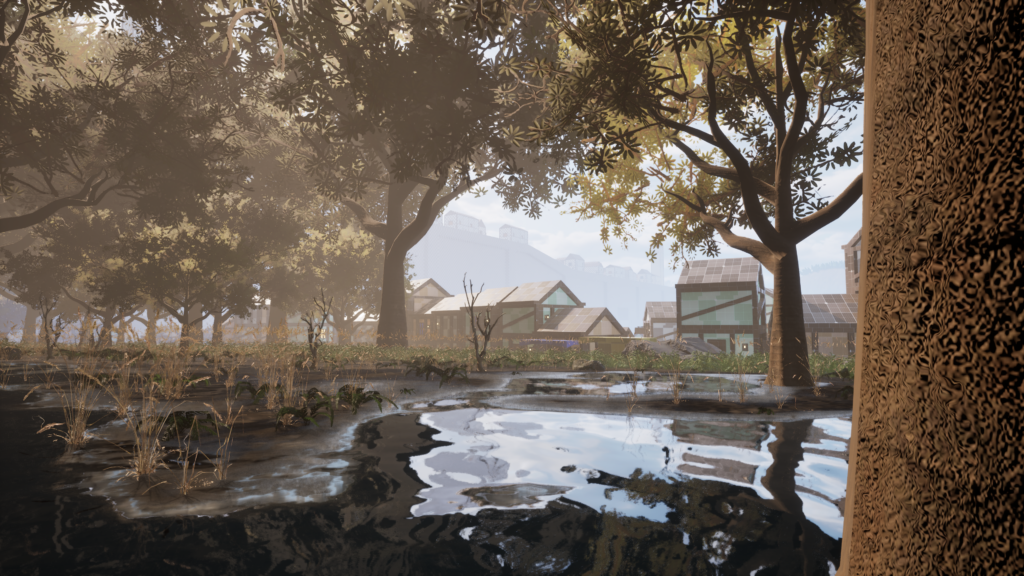
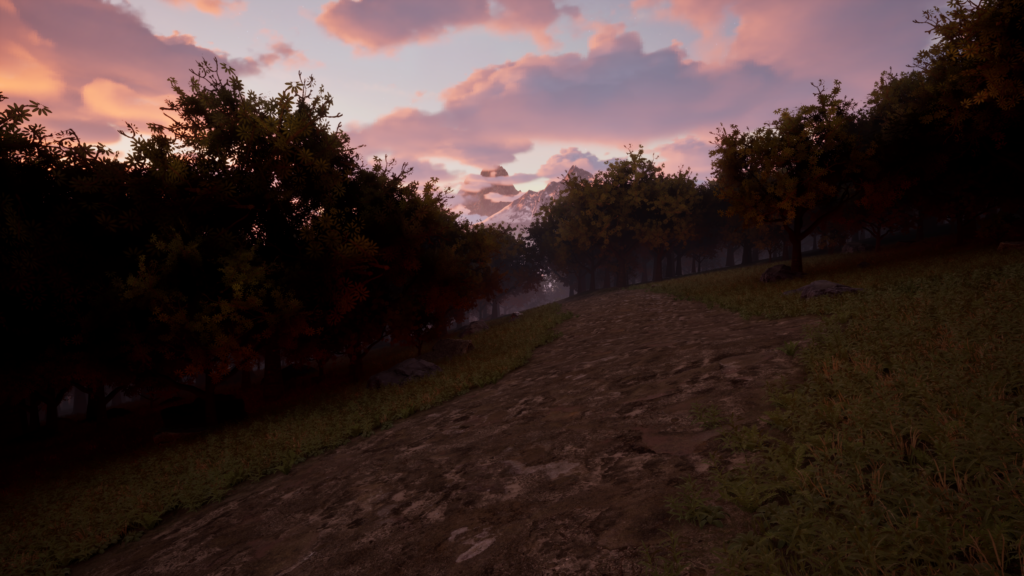
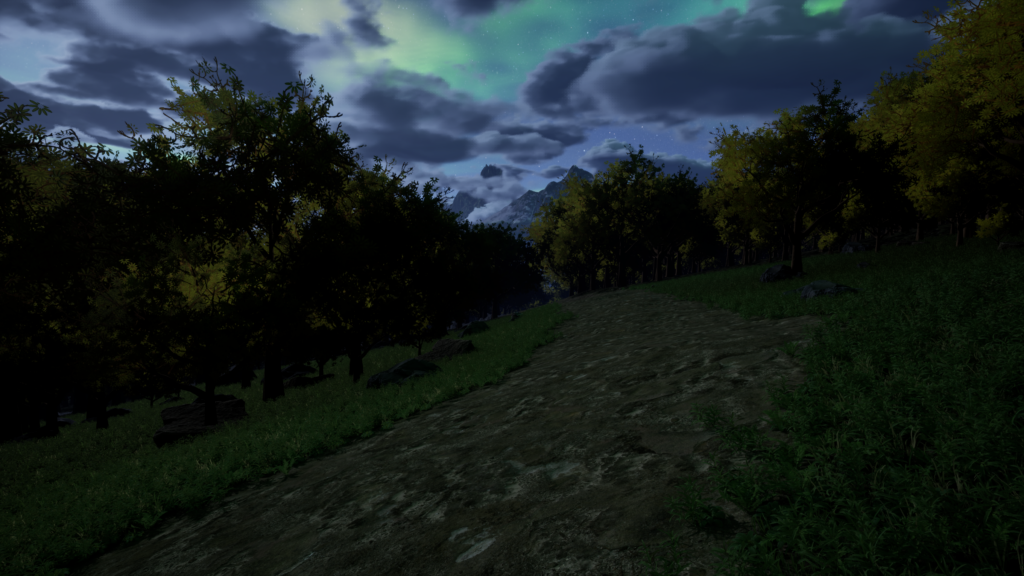
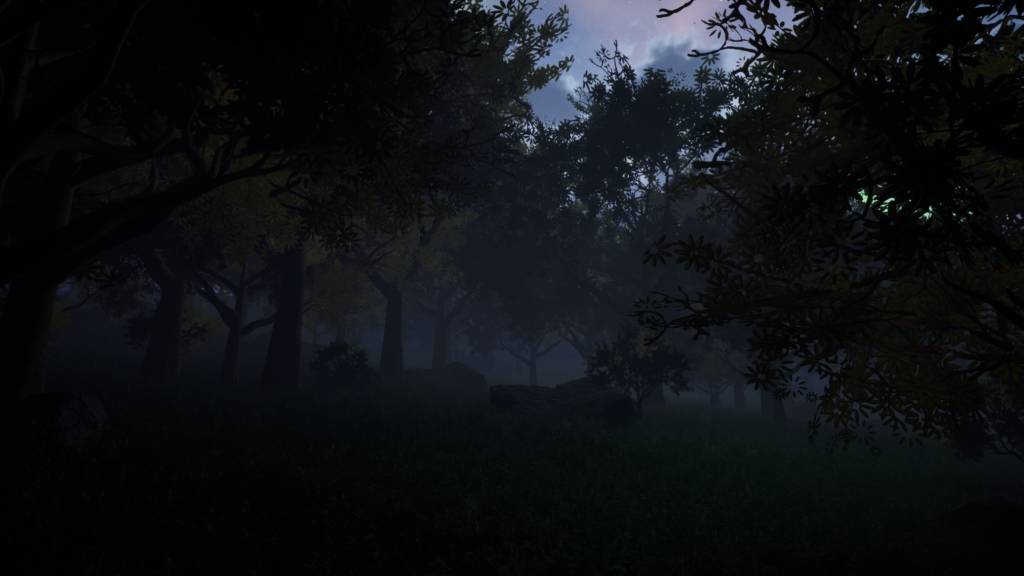
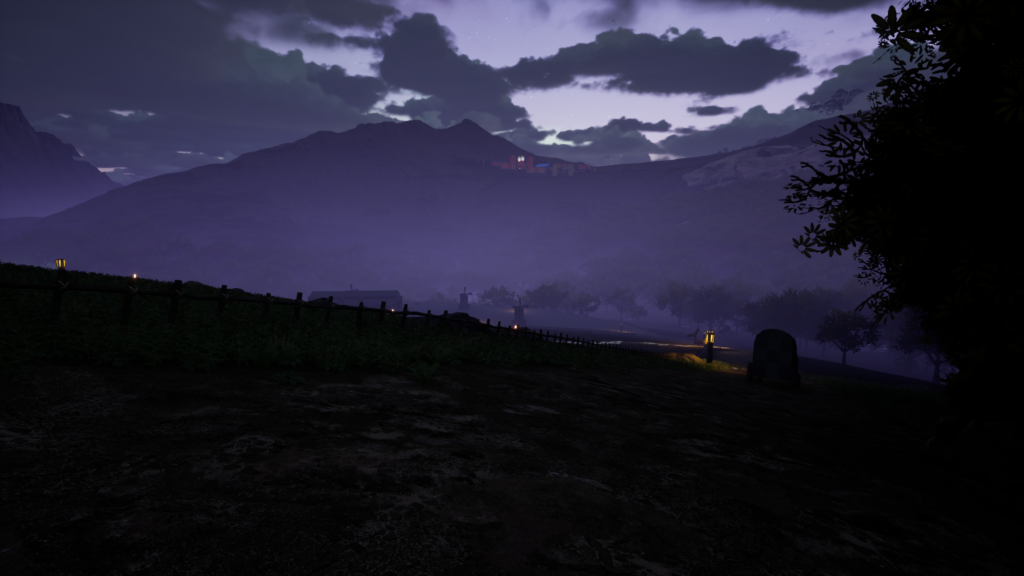
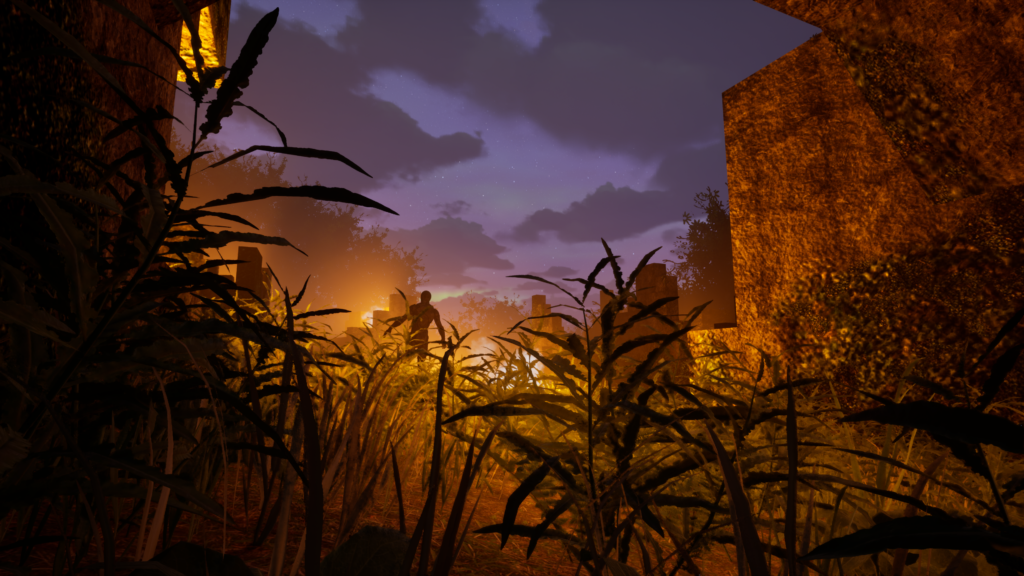
Finally, here are some beauty shots of Amidst the Eidolon!